How to install printers without a disk. How to connect a printer to a Windows computer
It happens more and more often that old, reliable and completely working equipment, such as a printer or scanner, can no longer be connected to a new computer due to the lack of drivers for it. What to do: throw it away, buy a new one (of unknown quality)? In this article we will tell you how you can connect any such “outdated” device to a computer running a new one. operating system(Windows 7, 8, 10).
In short, the situation is resolved as follows: a virtual computer is installed on our computer, with Windows XP (or another under which this equipment can work correctly), drivers are installed, and interaction is configured.
Let’s try to break down the connection step by step as an example. Canon printer LBP-800 and Genius ColorPage-HR6X scanner. The printer is connected to the computer using LPT, so it is advisable that the computer be equipped with the following port:

Motherboard with lpt port
If there is no such port, find out if it is possible to add it inside system unit using a PCI-LPT card:

Let's add the missing LPT port to the computer using this board
Various USB-LPT adapters most likely will not work normally (therefore, laptop users in this case cannot count on success):

Connecting USB devices, such as the Genius ColorPage-HR6X scanner, to the virtual machine will not cause any problems.
1. Which virtual machine should I choose?
- Windows Virtual PC (XP Mode)- included in Windows 7 Professional, Ultimate, does not work well with the LPT port. After updating to Windows 8 or 10, it stops working, all data from it is lost, because Microsoft decided so).
- VMware Player- free, no Russian interface, latest versions work only on 64-bit operating systems.
Oracle VM VirtualBox— free, has a Russian interface, does not support working with LPT, is a little buggy, and can sometimes freeze and turn off for unknown reasons.
2. Setting up a virtual machine
Of all the many programs, we chose VMware Player, so we will base our review on this example.
2.1. Download and install the creation program virtual machine.
2.2. We launch the program and create a virtual computer in it.

2.2.1. Create a New Virtual Machine.

2.2.2. Choosing a method Windows installations: either from the drive, or from an image file, or later (for example, from a ready-made VMware disk image file).

2.2.3. Select the name and location of the system.

2.2.4. For the XP “virtual”, 10 GB of space is enough and, for convenience, it consists of one file.

2.2.5. Let's review the hardware of the virtual machine.

2.2.6. All the default values are fine for us, we just need to add an LPT port.

2.2.7. Select “Parallel Port” (LPT), click Next -> Next -> Finish.

2.2.8. In order to add a shared folder for exchanging information between computers, click the “Edit” button virtual machine settings" (Edit virtual machine parameters):

2.2.9. Go to the Options tab, find the “Shared Folders” item, set the switch to the “Always enabled” position and check the “Map as a network drive in Windows guests” checkbox.
2.3. Install on virtual Windows machine XP.

We launch the virtual machine, install Windows and the necessary software package.
We will most likely need only those with which we will print (or scan) here, for example: a package of office Microsoft programs Office, to recognize scanned text, XnView to facilitate the process of scanning images.
3. Connecting an LPT device
In order to install an LPT device, like our Canon LBP-800 printer, you need to download its driver from the manufacturer’s website, or insert it into the drive installation disk, and, following the manufacturer’s recommendations, install it in our virtual machine.

9. Install the printer driver and check its functionality.
4. Connecting a USB device
In order to connect our Genius ColorPage-HR6X scanner (as well as any other USB device: printer, flash drive, webcam, etc.), you need to right-click on the icon of this device in the drop-down menu and click “ Connect (Diskonnect from host)"

After discovering a new device, install a driver for it, according to the recommendations of the manufacturer of this equipment.
5. Work
To print a file, you need to do the following: copy it to the exchange folder, launch a virtual computer, open this file in it, print it.
To scan something you need to: launch a virtual computer, launch a scanning program, scan (recognize text if necessary), copy the results of the work to the exchange folder. Now the results of the work can be used on the main computer.
6. Conclusions
Now old devices that are not supported by manufacturers are given a new life, and we save some money and nerves. After all, new equipment is not always better than old! True, all operations will now have to spend a little more time.

The Genius ColorPage-HR6X scanner driver for Windows 7 and older does not exist and, accordingly, it will not work on our main computer.

But for the VMware virtual machine - connection and normal operation outdated devices- quite a feasible task.
Question from a user
Good afternoon.
Can you help me with one problem... I have 3 computers at home: one PC and 2 laptops. They are all connected to Wi-Fi router. A printer is connected to the PC.
How can I set up my PCs, laptops and network so that I can send documents to the printer from my laptops? I tried to configure it, but nothing... Now I write the files onto a flash drive, and then print them from a PC, it’s inconvenient...
Good day!
In fact, both at home and in small offices, one printer is usually enough (of course, if you can print to it from any of the computers local network).
Actually, myself Windows setup to make a printer available to the public for a local network is not particularly difficult and any “average” user can handle it. In this article I will show you an example of how this is done...
We open access to the printer for the local network
Before describing the settings, I think important to report a few points:
- you must include a PC, printer, and laptops (other PCs) that will be configured;
- On the PC to which the printer is directly connected (to a USB port, for example), drivers must be installed (that is, printing should work normally on the PC itself). To find and install a printer driver -;
- The local network must be configured: computers have the same workgroups (you can see if you go to properties of my computer ), and different computer names (in general, if your local network is working, then this is so...).
Here, by the way, is a relatively good (because it’s mine) article on setting up a local network, I recommend that you read it if you have problems with your local network. Link below.
Setting up a local network -
Note: all settings below are shown and are relevant for Windows 7, 8, 10.
Now let's start setting up. The first thing you need to do is set up the computer to which the printer is directly connected (i.e., “share” the printer: we give access and permission to use it to another PC on the local network).
1) First open Control Panel/Network and Internet/Network and Sharing Center . Next, click on the link on the left - "Change additional options public access" .

2) Next we will have three tabs: private, guest or public , And all networks. Now you need to open them one by one and check the boxes in the right places. More on this below.
Note: in some cases there will be not 3 tabs, but 2. Then open those tabs that exist and do according to the screenshots below.

3) Expand the tab , and set the sliders to the following positions (according to the screenshot below):
- enable network discovery (enable automatic setup on network devices);
- enable file and printer sharing;
- Allow Windows to manage homegroup connections.

4) Then open the next tab - "Guest or public" . We exhibit:
- enable network discovery;
- enable file and printer sharing.

5) Last tab , here we display:
- disable sharing;
- Use 128-bit encryption to secure shared connections;
- disable password protected sharing.

Important!
A similar setting in these three tabs (private, guest, all networks) must be done on all computers on the local network (and not just on the one to which the printer is connected)! Otherwise, you will subsequently not be able to connect to the local printer.
Allowing access to the printer
First you need to go to: control panel/hardware and sound/devices and printers . If you have the drivers installed and everything is OK with the printer, here you should see it in the tab "Printers" .
Right-click on the printer you want to make network (public) and go to it properties. In properties, open the tab "Access" and check a couple of boxes:
- Share this printer;
- rendering print jobs on client computers.
Save your settings.
Printer sharing (clickable!)
To check whether your printer has become local, open a regular Explorer (you can open any folder). On the left in the menu you should see your computer name . In my case - the computer name is "Desktop-UGHM5R" - click on it and see that ours is present in the window that opens "shared" printer.
Now you can begin setting up other computers to enable them to print to the printer.
Note: Please note that next to the name of your PC, the names of computers that are on the same local network with you will be displayed.

How to connect a network printer and start printing
Important! Before you start connecting the printer, you must configure three network tabs: private, guest, all networks (I wrote about this just above). If you do not give permission to use shared folders, printers, etc. - you won’t see or connect the printer!
1) Turn on the computer from which we want to print (note: the PC is connected to a local network in which there is a computer with a connected printer).
Open File Explorer and click on the tab "Net"(on the left in the menu). Next, you should see a list of computers that are on the same local network as you: open the one that has a public printer (which we made network in the previous step).


3) 1-2 minutes (usually) will be required to install and configure the driver. At this time, it is better not to touch the PC or close this window (example in the screenshot below).

4) Next, if everything went well, the printer appears in the tab "Printers" and it can be used. Try opening some Word document, press the Ctrl+P button combination and send the document for printing (don’t forget to select the default printer; it’s usually not the printer you added).
Printer connected // task completed
Actually, that’s all there is to setting up Windows to create a public local printer. As you can see, in this regard, in Windows (7, 8, 10) everything is organized quite simply - you can figure it out yourself.
An even more convenient and versatile option would be to connect the printer directly to a Wi-Fi router. This way there will be no need to keep the PC connected to the printer turned on. In principle, there is nothing complicated there either - usually a special one goes to the router. Software that performs similar settings in automatic mode.
Windows 8.1 works very neatly with printers (and other network devices) as no other has worked before Windows version. If these devices exist and Windows 8.1 sees them on the network, installation will happen automatically.
This means that the first time you try to print a document, you will most likely see that your network printer is already in the list. Windows 8.1 with using Windows Update searches for the necessary drivers and installs devices in background. Usually, you just connect your printer, and Windows 8.1 itself takes care of the installation.
However, Windows 8.1 will not be able to install a printer if its drivers are not included in Windows 8.1 or are not available on Windows Update. In this case, you will need to uninstall and reinstall the printer. In Windows 8.1, there are two main ways to set up printers and other devices, the easiest of which is through PC Settings. Open PC Settings and go to PC and Devices, then Devices. Here you will see a list of all installed devices, but at the top of the window there is an “Add device” button. Clicking or tapping this button causes Windows 8.1 to automatically detect new hardware.
Installing new printers in PC settings.
If you want more control over your printer installation, or if your printer is not detected in PC Settings, you can open the Devices and Printers panel. Enter “devices” on the start screen and view all found devices and printers in the search results.
Devices and Printers window.
Attention. To remove a printer or other device from the Devices and Printers panel (possibly because the driver did not install properly), right-click the device and select the Remove Device option.
There are two ways to add printers in Windows 8.1, in the "Devices and Printers" panel. Click on the "Add device" link on the toolbar at the top of the window, or select "Add a printer", both methods work.
Initially, these options work the same, although they look slightly different. Both search options for network printers and other devices will show them. Their main difference is in installing the driver for the hardware.
Dialog box for adding devices and printers in Windows 8.1.
Add a printer using "Add Printer".
In the Add Devices dialog box, Windows 8.1 installs what it believes is the best driver available for that hardware.
Attention. If Windows 8.1 previously found your printer on its own and installed it with the wrong driver, it will reinstall the same wrong driver.
If the printer is not automatically found, click on the link “What to do if Windows does not detect the device”, a help window will open which will tell you how to solve this problem.
The second option, the Add Printer dialog box, is perhaps the most useful method installation of all printers (except the most difficult ones).
If the printer is not automatically found, you can click on “My printer is not listed” and activate additional device installation options.
Add a printer manually.
The Add Printer window has the following options:
- You can add a printer by its network name (usually provided by the IT department).
- You can add a printer by its IP address (discovered in a minute).
- You can add a printer via Bluetooth.
- You can configure the printer manually, depending on the port location.
Attention. If you need to find the IP address of a wireless printer, this can be done in the settings of the printer itself, on its display. For the exact method of obtaining the IP address, refer to your printer's user manual.
All other things being equal, most likely you do not know the IP address or network name of the printer. Most quick way The solution to this problem is to look at the printer configuration on another computer. This can be done in "Devices and Printers" (in Windows 7 and Windows 8.1). Right-click on the desired printer and select "Printer Properties". Under the "Ports" tab you will see the printer address.
Changing the printer address.
Attention. For example, you want to add an older device in parallel. By selecting "Add a local printer or network printer from manual settings"You can choose an LPT port for it.
IN home network or a small business network, finding a printer IP is easier, although the actual method depends on your router. The following steps describe the general approach:
- Open Internet Explorer.
- Access your router's login by entering 192.168.0.1 (sometimes 192.168.1.1 or 192.168.2.1) and pressing "Enter".
- Log into your router with your username and password (if they are still the factory ones, they should be changed!).
- Find LAN settings.
- Open Ethernet settings.
- Find the name of your network printer; its IP address is displayed as shown in the figure.
View the printer's IP address on the network.
Attention. Let's say you need to reset your router. In this case, uninstall and reinstall the printer on all your computers again, since Windows binds the driver to a specific IP address. To get around this problem, you can set the printer with a static IP address in the router settings.
For full operation of the printer, you need to install additional software - drivers. Usually, they come complete with the device, on a special boot disk. Without them, the computer will not detect the connected device. Of course, we are not talking about devices that are automatically recognized by the system. I would like to immediately note that you need to read the entire article, since there are complex and more simple ways installing drivers and therefore you need to read the article to the end. Almost at the very end of the article there is information on how to install a printer driver automatically, keep this in mind. When the question arises of how to install a printer without a disk, then inexperienced users they think it is very difficult. But in fact, this procedure can be mastered in 15-30 minutes. Let's check if this is true.
There are two main ways to install a printer without boot disk, namely, download the necessary drivers from the Internet
- Using basic Windows tools Update;
- Independently, knowing the device identification code or using the printer model.
The first method is perfect for simple printer models (only printing and scanning documents, without additional settings), because Windows Update installs a basic driver package.
The second method allows you to download the most latest version software, so after installing them, the user will have access to absolutely all printer functions, including more “advanced” ones.
In addition, the reason for installing drivers may be not only their complete absence, but also a malfunction of the device itself. Sometimes, using one driver or another, the printer refuses to print documents, and all because the driver you installed was not suitable for your device. This is, of course, one of the reasons why the printer may not work correctly, but as you understand, it’s not for nothing that we are talking about this right now. After all, below we will tell you how to download your driver to your computer, but if you are in a hurry, you may have difficulties. Therefore, proceed step by step.
If you have previously studied this issue somewhere and none of the methods were successful, then you can try downloading the drivers again. This article is universal - here we will tell you how to do it in different versions Windows.
Therefore, before installing a printer without a disk, you must:
1. Disconnect the device connected to the computer;
2. Go to the “Start” menu - “Control Panel” - “Devices and Printers” or “View devices and printers”;
3. Here you will need to find the line “Install a printer” or “Add a printer” in the top panel;
 4. The Add Printer Wizard will open, select “Add a local printer” from the options provided and click “next” (for Windows 7). If you have Windows 8 or 10, then at the bottom click “The printer you need is not in the list” - and then select “Add a local or network printer with manually specified parameters” and click “Next”.

 5. The Wizard for Installing Printers and Other Equipment will prompt you to select a port, leave the default parameters (LPT1, but in some cases you need to select DOT4_001) and go to the next step;
 6. Click on the "Center" button Windows updates"and wait for the available drivers to update;
 7. A list of printer manufacturers and main models will be loaded. May take from 5 to 30 minutes. Find the manufacturer on the left and the printer model on the right. Then click “Next”. In this case, we chose the HP brand and the LaserJet 1022 model.
 8. The installation wizard will ask you to come up with a name for the device (leave the default name or create your own), click “Next”;
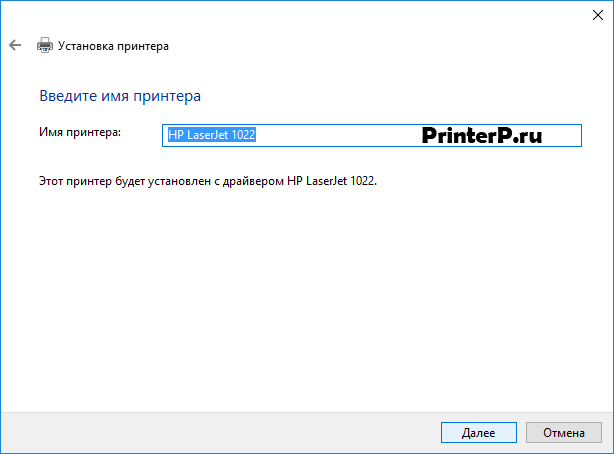
9. Wait for the installation to complete;
 10. The “Use general settings” window will open, here you need to select the “No sharing of this printer” option and click “Next” (the window will appear if Windows 7 is installed). If you have Windows 10, then you will see a window where you need to click “Finish” (the same window will appear later in Windows 7).

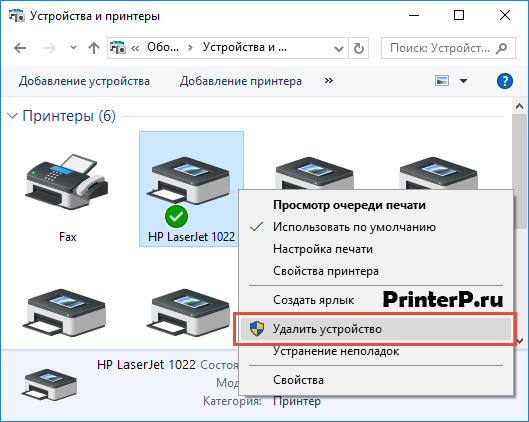
The next thing to do is to remove the newly installed device. To do this, right-click on the printer icon that appears and select “Remove device” in the context menu (in this case installed drivers will remain).
After these steps, you will be able to connect the printer to your computer. When you connect the printer, you need to wait a little for the computer to automatically recognize the printer and perform the installation. Then you can print any document to verify that the driver is installed.
How to do this on Windows 7:
Official sites
If you do not have a disk with printer drivers, you can download them from the manufacturer’s official website. To do this, it is enough to know the brand and model of the printer. You can find them in the documentation, on the case or back of the device. If you do not understand the instructions below, you can download the required driver on our website without any fears (all drivers are virus-free).
Open any browser and enter in the search bar: “HP LaserJet p1102 printer driver download.” In this article I will look for drivers for the above-mentioned device, but you need to indicate your model.

As a rule, the link to the official website of the developer will be on the first page of the search, at the very top. But this does not always happen and therefore you need to be careful. To avoid downloading malware instead of drivers, make sure that you actually went to the official website of the developer. To do this, pay attention to the site link in the search engine. There should not be anything “extra” (the address will be something like this: “hp.com” or “samsung.com”, etc.
If you doubt the authenticity of the site you found, you can enter only the name of the printer company without the model and other information. And already with home page go to the “drivers and other software” section.

Advantages of downloading drivers from the official website:
- Security (drivers have a digital signature, no built-in malicious code);
- The developer posts only the latest, “fresh” versions of drivers on the site.
Once you get to desired page(“Drivers and other files”, “Software”, “ Software", "Download", and "drivers" on English version site), all you have to do is enter your printer model and search.

In addition, some sites allow automatic mode determine the device model and the necessary drivers, for example, there may be a “Detect product” button. So, if we are on the HP website, we click “Product Search” and in our case, varieties of this model appear. We need to select the desired model by left-clicking.

After they are found necessary drivers, you will need to provide information about the version of your operating system and the system bit depth. If this window does not appear, then simply click on the link or button to download drivers.

A situation may also arise that the site will offer to download a driver version to choose from:
- Basic - to access the basic capabilities of the device;
- Advanced - for access to additional functions.
You don’t have to worry about which version you download, the main thing is to indicate the correct bit size of your system (discussed above).

Once the download is complete, you need to run the downloaded file and follow the instructions of the installation wizard.
Windows Update
operating room Windows system by default contains all the main drivers for the most popular peripheral devices. Including for printers and scanners. To do this, connect the device to the computer and wait a few minutes. If an attempt automatic installation printer will not be positive, you must do the following:
1. Open “Control Panel”;
2. Find “Hardware and Sound”;
 3. Left-click on “Devices and Printers”;
 4. A new window will appear with icons of connected devices. Find the image of your computer or laptop (in my case it's a laptop) and right-click on it. In the context menu that opens, click on the line “Windows Update”.

5. After this, a window will open where you need to click “Check for updates” in the menu on the right. Must begin automatic search available updates for all your devices. We must tell you that it is advisable to have fast internet, as this procedure may take 10-30 minutes.
 6. Now you need to wait for Windows to download the found updates automatically;
 7. After the search is completed and all found updates are downloaded and installed on your computer or laptop, you need to restart the device.
After restarting the computer, the printer should work. If after rebooting the computer still does not see the device, the root of the problem may not be in the drivers. Try connecting the printer to a different USB input.
Determining the Printer ID
Each device that connects to a computer has a unique identification code. If you know the hardware ID, then you can download the driver you need without any problems. If the instructions described above did not help you and you do not understand, how to install a printer without a disk, you need to find out its identification code. I recommend using this option in the most extreme cases, and if you downloaded the drivers from the official website, then you can skip this option.
So, to find out the ID:
1. Right-click on the computer and select “Properties”, then on the left click “Device Manager”;

 2. In the window that opens, find your printer. Right-click on the desired line and in the menu that appears, click on “Properties”;
 3. A dialog box will open where you need to go to the “Details” tab. Next, in the “Property” line, select “Equipment ID”.
 4. A value will appear in the window below, which will be the printer identification code (if there are several values, you must select the first one);
5. Copy the ID. Go to the official website of your printer manufacturer and search for the copied identification number. You can also use search engines to find the driver you need using the hardware ID. But don’t forget that our website has all the drivers for existing printers. All that remains is to download the found driver.
Remember that you need to download drivers only from official resources. It's absolutely free and as safe as possible.
Installing drivers automatically
To this problem never bothered again and drivers for any external devices installed automatically, just change the basic Windows settings. To do this:
1. Go back to the “Devices and Printers” menu (we told you how to get here above) through the control panel. Right-click on the “Computer” icon and select “Device installation options” in the context menu that appears;
 2. A dialog box will open where you need to select “Yes (recommended)” (recommended default settings) and click “Save”;

Now, after connecting the new Windows devices will automatically search and install the necessary drivers from its own database or using an Internet connection.
Installing a local printer in Windows 8 is much easier than in its predecessor systems. In order for the G8 to recognize the device, you just need to connect it with a USB cable to the computer and plug it into the network, the system will do the rest itself - install the drivers and configure the printer to work correctly. Network printers are also installed automatically (when shared access is allowed). If problems arise with this, you can install the printer manually.
How can I check if a printer is installed on my computer?
- Right click on Windows button(Start) and open Control Panel.
- Open the “Devices and Printers” section.

- See if your printer is on the list. If yes, everything is in order, if not, manual installation is required.

Installing a local printer on Windows 8
- Connect the printer to your PC and plug in. Click Power button on the printer panel.

- While in the “Devices and Printers” section, click the “Add a Printer” button. The device search and installation wizard will start.

- If the system detects the printer, it appears in the list. To install it, click “Next” and follow the wizard’s instructions one by one: confirm your consent, indicate the location where the drivers are located at the system’s request, etc.

- If your printer is not listed, make sure it is connected and working. After that, click “The printer you want is not in the list.” You will be asked to search for the device using other parameters. Check “Add a local or network printer with manual settings.”

- Specify the port to which the printer is connected and click “Next”.

- Select the manufacturer and model of the device from the lists, as well as the location from which the drivers should be installed - from Windows 8 Update or from a specified location, for example, from a DVD.

- Provide a name for the new printer.

- And, if desired, allow or deny public access to it. If access is allowed, specify the network location.

- The last step is to allow the printer to be used as the default (check if desired). To check if the installation was successful, print a test page. If everything is ok, click “Done”.

Installing a network printer on Windows 8
To use a printer connected to another computer, it must be shared. To do this:
- Go to the control panel of the PC to which the printer is connected, or right-click on the network icon in the tray. Open “Network and Sharing Center”.

- Click “Change advanced sharing settings” in the navigation bar.

- Open Settings the desired network and check the “Enable file and printer sharing” checkbox. Save your changes.

The following steps are performed on the PC from which you want to access printing.
- Open “Devices and Printers” in Control Panel as described above. Click “Add a Printer”.
- All available devices should appear in the list. Select the one you need and follow the installation wizard instructions.

If the printer you need is not available, click the link of the same name at the bottom of the window, then the following options will be available to you:
- Choice shared printer by name. Having noted this, you can manually register the network path to the device or find it through Explorer.

- Add a printer via TCP/IP or by host name. Once you select this, you will have to manually specify the device type, its IP and port name. The installation wizard will guide you through the remaining steps.

- Add a Bluetooth, wireless, or network discoverable printer. After selecting this item, the system will check if there are available wireless printers on the network and, if so, will offer to install.

We discussed the last option above, so we will not return to it.
Troubleshooting printer installation problems
Why does the system not see the printer?
Windows 8 may not detect printers for the following reasons.
Local:
- The USB port or cable is faulty.
- The printer driver is not supported by the system.
- The Print Spooler service is not running.
- There is a driver conflict.
- The system is infected with a virus.
- There is no connection with the computer to which the network printer is connected (turned off or unavailable due to incorrect sharing settings).
- The network path to the printer is incorrect.
- The computer does not see the printer port or is connected to the network via a VPN connection.
Troubleshooting problems connecting a local printer
- Check whether the system sees the printer when connected to a different port and cable.
- Install latest updates Windows 8 and also reinstall the printer drivers. Use the latest versions.
- Make sure that the Print Spooler service is running on your computer. To do this:
- open the “Services” tab of the task manager and click the “Open services” link at the bottom of the window;

- Find “Print Manager” in the list, open it context menu and click “Start” if the service is stopped.

- If another printer was installed on your computer, uninstall its driver and software.
- Scan your system for viruses.
Solving problems connecting a network printer

After that, check if the printer can see your PC. After following all the instructions, the problem should be resolved.


