What is the place for a tick in the table called? We put a tick in Word using standard program tools
In a programme Microsoft Word There are a huge number of possibilities for editing text. Using this program, you can increase the visibility of the text, improve its perception, and also highlight certain points. One of these moments in the program is the ability to add characters that are not on the keyboard. Now I’ll tell you how to put a tick in a box in Word.
The “tick” symbol can be used to highlight completed items in various lists: shopping list, to-do list, etc.
How to put a tick in a Word box in a document in two ways
- Using the special characters box
Firstly. In the program menu, select the bookmark "Insert". In the far right section "Symbols", select the line with the inscription "Symbol". In the menu that opens we see popular icons. Select a line "Other symbols".

Secondly. We see a lot of different icons. There is a panel at the top called "Font". Choosing « Wingdings2", special icons will open for you. Among them lies the “tick”.

Third. You probably noticed that there are different options for “checkmarks”. As well as all kinds of crosses and strikethroughs. Select the icon you like with the left mouse button and click on insert.

Now let's try to insert the desired character using the second method.
- Using hotkeys.
Firstly. Follow the first two steps from the previous method. We are again in the window with special icons.
Secondly. Now let’s select the icon we like again, but don’t insert it. Please note that when we click on a symbol, in the line "Sign code" a number appears. It is advisable to remember or write it down.

Third. Now close the unnecessary window and choose where to insert the icon. Clamp keyAlt and enter in numbers the “Sign Code” that we just remembered. For show, it will look like this: Alt + 80.
Thus, we learned how to put a tick in the box in Word in the place you need in the text.
Put a checkmark symbol in Word
To check the box Word document you need to go to the “Insert” tab and then to the “Symbol” group. Next, select “Fonts”. Depending on the version of Word: Wingdings or Wingdings2. Scroll through the symbols until you find the one you need. Click on it with the left mouse button, and then “Insert” and it will appear in the text in the place where it is indicated. The symbol window can then be closed.
The checkmark icon will be automatically added to the “Previously used symbols” line; you can use it when necessary and not perform a search operation.
You can also check the box using the keyboard, but you will still have to use the method described above to find out its digital code in the general list. Select a character and remember its number in the “Character code” line. Place the cursor in the desired place in the document, press the Alt button on the keyboard and at the same time press the code number. A check mark will appear at the cursor location.

You can use another method. In the “Symbol” window, select the check mark symbol and click on the “Keyboard shortcut” button. In the “Keyboard settings” window, you need to enter the cursor in the “New keyboard shortcut” line and type Alt and any character you like on the keyboard, for example, “ъ”. The word “No” will appear in the “Current Assignment” line, which means that this button combination is not yet in use. Then click “Assign” and while working with text you can now combine the Alt+ъ keys to put a checkmark in the desired place.

Put a checkmark symbol in Excel
Inserting a checkmark in Excel is the same as in Word using the Insert tab. It doesn’t matter whether the user is working in which program, the mark symbol that is already in the text or table can simply be copied and pasted in the right place.

Keyboard character code
During this fast way, numbers are entered precisely from the numeric keypad, which is located on the right; the top row of numbers is not suitable for this. Select the “Wingdings” font and press while holding Alt. Next, type the following combinations of numbers on the numeric keypad:
Checkmarks
Alt+0252
Alt+0254
Remember that you will need to change the font to Wingdings before the character code can be entered. At the end you can change it to the font you need.
The need to check a box occurs relatively rarely among users of the Word utility. Most often, it is required by the compilers of various questionnaires, who indicate a tick in the legend as one of the ways in which the respondent can mark the answer option he is interested in.
The checkbox belongs to a Word category called "Special symbols". Unlike some similar symbols, inserting a checkmark into the text does not require special knowledge of any complex code or little-known command.
Below we will look at the ways in which Microsoft users Word programs can easily and effortlessly insert a check mark into the text.
Via the "Insert" menu
How to check a box in Word 2003
To do this, follow the steps below simple algorithm of actions:

How to check a box in Word 2007
To do this, use the recommendations below and do them strictly in order:
- Click in the text field where you plan to place your special sign and make sure the cursor is positioned exactly where needed.
- At the top of the Word utility window, find a menu item called “Insert” and left-click on it.
- Find the tab here called “Symbols” and click on it.
- In the drop-down window that opens, click “Other symbols.”
- A window will appear in front of your eyes, in which many different symbols will be presented in the form of a table. Among them you will need to find the one you are looking for. Having found a checkmark, left-click on it with your mouse to select it, and at the bottom of the window click on the “Insert” button. The symbol will appear in the text field exactly where your cursor was located.
- Click on the "Close" button to exit this window.
Put a tick in the box in Word
The process of placing the special character we need in a square is similar for both older versions of the Word utility and modern ones, so let’s immediately move on to step-by-step review of the action algorithm:

How to check a box in Word using hotkeys
In this case you need to proceed as follows:
- If you have old version software, then you need to click on the menu called “Insert”, then click on “Symbols” and open a window where you will see a table with all the possible symbols and signs supported by Word. In new versions of the software, click on “Insert”, then on the subcategory “Symbols” and in the drop-down window click on “Other symbols”, after which the same table with symbols will open in front of you.
- Now look in top part window. There you will need to find a form next to which it says “Font”. Write “Windings 2” in the form field.
- Click on the sign you are interested in to highlight it.
- Now turn your attention to the area located under the table with symbols. Here you will find a field called "Character Code". Remember it, as you will need it later.
- Close the window containing the special characters.
- Place the cursor in the place in the text field that you need.
- After this, press the key called ALT and, without releasing it, type the code that you remember using the numbers on the keyboard. You will then need to release ALT and a checkmark symbol will appear where the cursor was.
One of the simple actions that causes tension among novice users is how to check a box in Word. This problem occurs with any other icon that is missing from the keyboard. Draw it with graphic editor and quite difficult to insert. You can find a document with an analogue, copy and paste. This method also requires time and some effort.
All computers and most text editors provide input for labels that are not available on the keyboard.
If you want to develop your mlm business, then read the VekRost reviews here, they will be very useful.
Figure 1. Table of symbols in Word.
The main method for inserting letters and marks that are missing on the keyboard is a symbol table. Using this function, you can insert additional tags not only in word, but also in all other editors, including notepad.
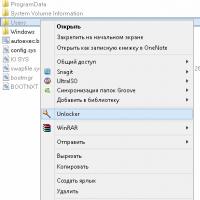
To get started, open the working file with the desired text editor. Then open the main menu. To do this you need to press on your keyboard Windows key or hover your mouse over the Window icon, lower left corner of the monitor. In the menu that opens, select “All programs” (Fig. 1).
Scroll down with the wheel to find the “Service” item, hover the pointer, press (click) the left key. A menu with additional items will open. Among them you need to find the “Symbol Table” and open it (Fig. 1).
In operating rooms Windows systems 8 and 8.1 tables are easier to find through the search window by typing this phrase.
Using the same method you can open this function for previous versions (Win XP, 7).
The window that opens represents the full set of labels that can be displayed when typing. In the top window there is the name of the font in which the icons are displayed. A small black triangle, when pressed, opens a list of possible sets to display. Most contain the same set, displayed in different ways.
The icon is found among the "Wingdings" and "Wingdings 2" packs. To search, you need to click on the triangle, the top window, find the specified set, go to it. Find the image in the changed window. "Wingdings" contains 2 images - just an icon and a square with a label. Wingdings 2 has created more options.
 After finding the desired icon, you need to select it with the mouse. Place the pointer over the icon and press the left mouse button. The icon will increase in size and come to the foreground. At the bottom of the window you need to click the “Select” button, then “Copy”.
After copying, go to the window text editor, place the cursor at the desired location, press the key combination “Ctrl+V” on the keyboard or use the right mouse button.
In the menu that opens, select “Insert”, select it, and press the left mouse button. The selected icon appears in the text field. You can insert any number of times if necessary.
Methods for Word
Inserting a word checkbox is also quite simple. Because the OS They have a friendly interface (method of communication), and the operation can be performed using several methods.
Character panel

Figure 2. Location of the “insert” tab in Word.
First you need to open the working or new document using word. The text field cursor should be positioned at the position required for insertion. The concepts of “text editor cursor” and “mouse pointer” should not be confused. The mouse pointer (Fig. 2) should be placed on the “Insert” tab, English version"Insert".
Press the mouse button. The menu or panel that opens will show possible further actions. Among them you need to find the Ω icon, usually located on the right edge. When you press a key on it, a panel of additional symbols will open.
The window contains a large number of images, among which it is quite difficult to find the one you need on your own. The badge icon is located among the Wingdings or Wingdings 2 pack.
This name should be selected from the list that opens when you click on the black triangle in the “Fonts” window. The icon icons are located on the bottom row. You need to select the one you need with the mouse and click the “Insert” button. If you use the buttons frequently, you can select a combination of buttons to automate insertion.
Inserting via font selection

Figure 3. Selecting the desired Wingdings 2 font.
This method can also insert any character into word. The operation is performed through the font selection window. IN open document You should use the mouse to open the list of fonts, select “Wingdings” or “Wingdings 2” (Fig. 3). The second version contains a richer set of labels.
Check the location of the text editor cursor, press the key combination “Shift + P”. The printing language must be English. The text field should display P.
You can change the size and appearance using the font size and its properties:
- P—character size changed to 18;
- P- emphasized.
If you don’t know the required key combination for a particular character, you can determine it in the following way. Install the “Wingdings” font, print all the characters on the keyboard:
- `1234567890-= - 1st row of keyboard;
- qwertyuiop\ - 2nd row;
- asdfghjkl;’ - 3rd row;
- zxcvbnm,./ — 4.
You will get a set like this.
If the required symbol is not among them, you should use one of the methods described above.
Using these methods you can insert a printed sign. Other functions are used to set up an interactive word window with the ability to insert or remove a checkmark.
Sometimes, to highlight the most important information We would mark it on paper with a special sign – a tick. But today we will show you how to put a tick in Word and even offer several ways to do this.
Method one: use image insertion
You can find a beautiful image of a checkmark and use the Insert-Picture commands to place the checkmark in the desired location. To avoid further formatting problems (for example, when changing letter sizes, your checkbox may end up next to a different item), you should set the wrapping to Text.
But we remember that inserting a picture will certainly add weight to your document, and if you check a lot of such boxes in Word, the weight will increase significantly.
Method two: insert a symbol
This method allows you to insert a check mark without greatly increasing the weight of the document. An additional advantage of symbols is that, like ordinary letters or numbers, they can be formatted (changed in size, color).


By the way, in our case, when there is an enumeration, it is better to use the third method.
Method three: create bulleted list, with markers in the form of ticks
On the Home tab, in the Paragraph panel, we find a button for creating a bulleted list. Perhaps among the recently used ones, you will immediately see the required checkbox, and if there is none, go to the Define a new marker item:

Set a new Symbol for the marker, find it in the Webdings, Wingdings or Wingdings 2 font set

We get a list with checkmarks next to each list item.

We remove markers on items where a check mark is not needed. This can be done by placing the cursor in front of the marker and pressing the backspace key (←BackSpace) or in the Paragraph panel by deselecting the marker from this item:

Aligning records:

And, as always, finally - the simplest method, which is used by advanced users.
Method five is the easiest
If you need to put a single tick character in Word, on the Latin keyboard type P (Schift+P), select the resulting character, change its font to Wingdings 2

We hope that after reading our article you will not have any questions about how to check a box in Word, and you will choose the most convenient method for yourself. Good luck!