1c mobile application builder. Mobile client: installation, debugging, assembly for Android"
Development example mobile application on 1C:Enterprise 8.3 for the work of an online store courier when delivering goods to customers. The "Mobile Application Builder" configuration was used for development.
An example of developing a mobile application for an online store courier using the "Mobile Application Builder"
So, we have developed a mobile application for the work of an online store courier when delivering goods to customers. Of course, it is quite schematic and cannot cover all the tasks that actually arise during the work of a courier. But it implements all the functionality that we wanted to show in this book.
Now, after the development is completed, all we have to do is assemble our mobile application into one file and download it to the tablet.
Although we will use a special configuration for assembly Mobile Application Builder, which facilitates the assembly process, is still not easy or quick to do for the first time. Therefore, you need to be patient and carefully and carefully follow the sequence of actions described below.
Where to download and how to install Mobile Application Builder
Configuration Mobile Application Builder supplied as part of the mobile platform. In the first chapter of the book, in the section “Mobile platform 1C: Enterprise”, we unpacked the archive with the mobile platform onto the computer. In this directory there is a MobileAppMaker folder with a Setup.exe file for installing the configuration template. Let’s run this file and install the configuration template into the “1C:Enterprise” templates directory (Fig. 5.1).


Rice. 5.1. Installing the Mobile Application Builder configuration template
Then we will add a new information base to the list of information bases “1C:Enterprise” and create an information base from the previously created template (Fig. 5.2).

Rice. 5.2. Creating the “Mobile Application Builder” information base from a template
Then we will open this database in the configurator and add the Administrator user with the 1C:Enterprise Authentication properties, the Administrator and User roles and the Russian language (Fig. 5.3).

Rice. 5.3. Creating an "Administrator" user
Let's save the configuration, close it and open it in 1C:Enterprise mode as the Administrator user. Now this database is empty. We must fill it with all the necessary parameters for the assembly, which will be saved and used for further assemblies.
First (if the database is empty), a general one opens on the initial page of the application background information about the mobile application builder. You can also access it from the main menu – Main Menu > Help > Help Contents > Mobile Application Builder. In addition, additional help pages about assembling mobile applications are opened from individual configuration forms (Fig. 5.4).

Rice. 5.4. Mobile Application Builder configuration help
Configuring Application Solution Parameters
First we have to configure the collector settings. To do this, from the Tools menu, call the Application Settings item. We will not be building a mobile application for Apple now, so we will leave the corresponding checkbox empty.
In the settings form, we need to fill out the table Component directories on computers participating in the build process, which will contain the paths to the software components necessary to build the mobile application. To do this, click the Create button above this table (Fig. 5.5).

Rice. 5.5. Creating a table entry “Component catalogs...”
The Component Paths form will open. By calling help from this form, you can see links to obtain software components and their descriptions (Fig. 5.6).

Rice. 5.6. Help describing paths to components
First you need to install the Java SDK and in the JDK field indicate the directory in which this component is installed. The Java SDK can be obtained from: http://www.oracle.com/technetwork/java/javase/downloads/index.html. It is recommended to download the package Java Platform(JDK).
On the page that opens, at the top you need to click on the Download button (Fig. 5.7).
 Rice. 5.7. Getting the Java SDK
On the next page you need to accept the license agreement (check the Accept License Agreement box) and click on the link with the desired distribution in the Download column (for 64-bit Windows - this is the jdk-8u60-windows-x64.exe package), Fig. 5.8.
 Rice. 5.8. Getting the Java SDK
The resulting installer needs to be launched and the Java SDK installed, for example, in the directory: C:\Program Files\Java\jdk1.8.0_60 (Fig. 5.9).
 Rice. 5.9. Installing Java SDK
Then this path must be specified in the JDK field of the form for setting paths to components of the Mobile Application Builder application (Fig. 5.10).
 Rice. 5.10. Configuring paths to components of the Mobile Application Builder application
In the next field of the configuration form, Working directory and builder cache, you need to specify any directory in Latin in which the build program will place service files. The user on whose behalf the mobile applications will be built must have full rights for this directory (Fig. 5.11).
 Rice. 5.11. Configuring paths to components of the Mobile Application Builder application
In the Android SDK field, specify the path to the directory where the SDK Manager is located. We installed the Android SDK in Chapter 1, in the “Android SDK” section (Fig. 5.12).
 Rice. 5.12. Configuring paths to components of the Mobile Application Builder application
Then you need to install Apache ANT and in the Apache ANT field specify the directory in which this component is installed. Apache ANT is required to build a mobile application for Android OS. Apache Ant can be obtained.
From this page we need to download the apache-ant-1.9.6-bin.zip archive (Fig. 5.13).
 Rice. 5.13. Getting Apache ANT
Unzip this file to your computer and specify the path to it in the form of setting paths to components (Fig. 5.14).
 Rice. 5.14. Configuring paths to components of the Mobile Application Builder application
Then you need to install the PuTTY system and in the PuTTY field specify the directory in which this component is installed. PuTTY can be obtained.
PuTTY is used if you are building a mobile application for Apple. To build mobile applications, the pscp.exe and plink.exe utilities are required. Just in case, let’s download the entire installation package putty-0.65-installer.exe (Fig. 5.15).
 Rice. 5.15. Getting PuTTY
The resulting installer needs to be launched and PuTTY installed, for example, in the directory: C:\Program Files (x86)\PuTTY (Fig. 5.16).
 Rice. 5.16. Installing PuTTY
Then we indicate the path obtained when installing PuTTY in the form for setting paths to components (Fig. 5.17).
 Rice. 5.17. Configuring paths to components of the Mobile Application Builder application
This completes the configuration of component paths. Click Record and Close.
Configuring Provider Options
Now we need to configure the provider settings. To do this, call the Edit supplier parameters item from the Tools menu.
The Suppliers form will open, in which you need to specify an arbitrary name of the supplier on the General parameters tab, and also set the Application ID Prefix. This field must be filled out in Latin and begin with the line “com”. The rules for filling out this field can be found in the contextual help, which can be opened by clicking the button with the “?” sign.
Then you need to note for which operating systems the mobile application is being built. In our case, select the For Android OS checkbox.
To work with push notifications through the auxiliary service “1C:Enterprise” we will specify the parameters for accessing the service. To do this, click the Add button above the table at the bottom of the supplier form. In the window that opens, Access parameters for the auxiliary service “1C:Enterprise”, check the Register for – selected user option, select the collector user – Administrator and specify email address and the password with which we previously registered on the service when testing work with push notifications. Click the Save and Close button. In addition, you can register for the 1C:Enterprise service directly from this form using the Register in the 1C:Enterprise service button, if this has not already been done (Fig. 5.18).
 Rice. 5.18. Configure Mobile App Builder app provider settings
In addition, you can call the window for setting parameters for access to the 1C:Enterprise service from the Tools menu, item Access parameters for the 1C:Enterprise service.
After this, you need to fill in the Developer Key group of fields on the Settings for Android OS tab. To do this, first create a developer key by clicking on the Create a developer key link. In the Create a developer key form that opens, fill in the fields randomly (for the Country field you need to specify the code of Russia in the ISO standard - ru) and click the Generate key button (Fig. 5.19).
 Rice. 5.19. Configure Mobile App Builder app provider settings
After this, the developer key parameter fields will be filled in automatically (Fig. 5.20).
 Rice. 5.20. Configure Mobile App Builder app provider settings
The value in the SHA1 hash field of the developer key will be used in the future to obtain the key to work with Google maps. This value is required if the mobile application will use geolocation tools on the Android platform.
This completes the configuration of the supplier parameters. Click Record and Close.
Loading the mobile platform
Now we need to download the 1C:Enterprise mobile platform, under which the assembled mobile application will run. There may be several versions of the mobile platform, but they must be no lower than version 8.3.4.
The Mobile Platforms directory is intended for downloading and storing different versions of the mobile platform. A separate entry must be created for each platform version in this directory.
From the application command panel, open the Mobile platforms directory and click the Create button. After this, a file selection dialog will appear in which you need to select the file with the archive of the mobile platform mobile.zip, which we saved on the computer when receiving the mobile platform in the first chapter of the book, in the section “Mobile platform 1C: Enterprise”. Select it and click the Open button.
If the platform is successfully loaded, the form for creating a directory item Mobile platforms will open, in which the Mobile platform version and Name fields will be filled in automatically, and the Mobile platform files loaded checkbox will appear (Fig. 5.21).
Click Record and Close.
Loading mobile configuration
Now we need to load the mobile configuration of the Courier Online Store that we have developed. Let's open this configuration in the configurator. In the configuration properties palette, set the properties Vendor – myfirm and Version – 1.0.0 (Fig. 5.22).
 Rice. 5.22. Properties of the mobile configuration of “Courier Online Store”
Then we will upload this configuration to a file by executing the configurator command Configuration > Mobile application > Write to file...
The Mobile Configurations reference book is used to download and store different versions of mobile application configurations. The directory assumes a two-level structure: groups describe application solutions, and elements in the groups represent different versions of the configurations of these application solutions. To download a new version of the configuration, you need to go to the group corresponding to the application solution and create a new element in this group.
From the command panel of the application, open the Mobile Configurations directory and click the Create group button with the name of our configuration Online Store Courier (Fig. 5.23).
 Rice. 5.23. Creating a directory group "Mobile configurations"
Then in this group we will create a new directory element.
After this, a file selection dialog will appear in which you need to select the 1cema.xml file into which we just saved our mobile configuration. Select it and click the Open button.
If the configuration is successfully loaded, all form fields will be filled in automatically and should not be changed manually. The permissions table will indicate all the permissions for the mobile application to work with multimedia, geopositioning, notifications, etc., which we set during its development. In addition, messages will be displayed about the impossibility of working with calendars and contacts, permissions for which we did not set (Fig. 5.24).
Click Record and Close.
Description of mobile application parameters
Now we need to describe the parameters of the mobile application that we will collect in the Mobile Applications reference book.
The reference book should have a two-level structure, where the group describes the main assembly parameters, and the group element specifies the assembly parameters for a specific version of the mobile application. A separate group must be created for each mobile application, and for each version of the mobile application in this group you must create its own element.
From the application command panel, open the Mobile Applications directory and click the Create group button. In the form that opens, set the name of the mobile application Courier Online Store.
We have one supplier - My company. It will fill in automatically. The For Android OS checkbox will also be selected. Leave the Mobile platform field empty - the latest version of the platform will be automatically used during assembly.
In the Solution ID field, enter an arbitrary string in Latin. The next field will be filled in automatically (Fig. 5.25).
 Rice. 5.25. Creating a directory group “Mobile applications”
After this, the Parameter for obtaining a key for working with Google maps field will be automatically filled in (the value of the parameter Hash SHA1 of the vendor developer key My Company from the supplier settings form is inserted into this field, see Fig. 5.20 + solution identifier line) - we will need this to obtain the key for working with Google maps. To do this we must turn to Google service and after receiving the key, write it down in the Key for working with Google maps field.
We recommend purchasing this course complete with the course “Development of mobile applications on 1C 8.3”.
In the second course, we examine in detail the monetization of mobile applications, as well as what you need to consider in advance when developing them.
Possibility to add a second course to your cart will appear in the form for entering an order - after you click the “Place an order!” button..
Guarantee
We have been teaching since 2008, we are confident in the quality of our courses and give our standard 60-day warranty.
This means that if you started taking our course, but suddenly change your mind (or, say, do not have the opportunity), then you have a 60-day period to make a decision - and if you make a return, we return 100% of the payment.
Installment payment
Our courses can be paid for in installments or in installments, including without interest. At the same time You get immediate access to materials.
This is possible with payments from individuals in the amount of RUB 3,000 or more. up to 150,000 rub.
All you need to do is select the payment method “Payment via Yandex.Checkout”. Next on the site payment system select “Pay in installments”, indicate the term and amount of payments, fill out a short form - and in a couple of minutes you will receive a decision.
Payment options
We accept all major forms of payment.
From individuals– payments from cards, payments with electronic money (WebMoney, YandexMoney), payments through Internet banking, payments through communication shops, and so on. It is also possible to pay for the order in installments (in installments), including without additional interest.
Start placing your order - and in the second step you can choose your preferred payment method.
From organizations and individual entrepreneurs– cashless payment, delivery documents are provided. You enter an order and you can immediately print an invoice for payment.
Training of several employees
Our courses are designed for individual learning. Group training on one set is illegal distribution.
If a company needs to train multiple employees, we typically offer “add-on kits” that cost 40% less.
To place an order for an “additional kit” select 2 or more course sets in the form, starting from the second set the cost of the course will be 40% cheaper.
There are three conditions for using additional kits:
- You cannot purchase only an additional set if at least one regular set was not purchased before (or along with it)
- There are no other discounts for additional sets (they are already discounted, it would be a “discount on a discount”)
- promotions are not valid for additional sets (for example, compensation of 7,000 rubles) for the same reason
I remember that wonderful time when assembling the release version of a mobile application was reduced to the fact that you had to set debug = false and start exporting the apk file. 2 minutes pass while the IDE chugs and everything is ready. All efforts focused on the need to specify the signing certificate data. This was quite recently. Now the process of building that very application has grown so much that if I suddenly need to perform all the operations myself, and even if I remember everything and do it correctly (which I don’t believe in), it will not take an hour, which today seems prohibitively long , and, most likely, a day, after which the therapist will be required to prescribe me sick leave for fatigue for two weeks.
So, the process of building a mobile application. I’ll try to tell you what it consists of - not because it has recently become fashionable to post about this or that CI mobile team(with poker, mermaids and other obligatory attributes), but because this is a great experience that I got while working on Mail.Ru Mail for Android, and because this opportunity most likely would not have existed if I had worked in another team, on another project or in another company.
For any process, an important decision is the choice of system on which the entire assembly will be built. Builds should be handled by the build server. It's logical. But which one to choose?
The question is ambiguous, everyone chooses one or another solution based on their experience, the tasks facing the system, and the resources they have. Some people like free solutions because they don’t have to explain to their boss why you needed $N000 a year and why you can’t do without it. Some are motivated by the presence of a community or the experience of a huge number of teams who have already used these solutions and are satisfied with the result. The number of points of view tends to match the number of people who have asked this question. I cannot say that someone's argument is valid or that someone's objection is irrelevant. But, no matter what the views of the developer who is faced with such a problem, the majority will agree that, by and large, all the popular solutions on the market differ only in ease of configuration, integration with related systems, expansion capabilities and support from the community or system developers.
In general, choosing a build server is a topic for a separate discussion. Let me just say that we chose Atlassian’s Bamboo Build Server solution. There are several main reasons, one of them is the ease of integration with the issue tracker that we use in the project, as well as with code review and repository hosting systems. The guys are great at this: everything is convenient, everything is at hand, and, most importantly, almost all the provided solutions and options fit perfectly into our team’s development process
Bamboo
Bamboo is a very common solution and is used by a huge number of teams around the world. A detailed description of how this CI/CD Tool works can be found on the official documentation website, but I will allow myself to freely translate a small part of this document in order to avoid discrepancies in terminology.The task of the Continuous Integration server is to perform all the work of assembling, testing, and deploying to the test environment of the project. The CI server contacts the repository, receives a specific revision of the project, performs all the necessary actions and provides the finished build result to the project team.

| Project |
|
| Build plan (Plan) |
|
| Stage (Stage) |
|
| Job (Job) |
|
| Task (Task) |
|

More or less similar divisions are available in any assembly system and provide the necessary flexibility in the design of the entire process. At first glance this seems like overcomplication. This was the case with our project when we just started using Bamboo, but gradually everything settled down, a clear understanding emerged of which part of the entire assembly process should be scaled, which should remain isolated, and a fairly harmonious structure developed within the framework of the proposed concepts.
In general, you need to understand well that a build server or CI server is an important part of automating the software development process. By assigning to this module all the tasks and work that need to be done at different stages and levels of preparing an application for release on the market, we get a kind of Application Release Pipeline. It, in turn, makes it possible to easily determine which tasks are included in a particular build, at what stage the release is now, what problems arise when integrating new functionality, at what stage of hotfix preparation we are now, and much more.
So, we gradually approached the description of how this is done in our team.
Tasks
Our build project is divided into several stages, reflecting the main tasks at the moment:- Assembly - includes all assembly options that may be needed during the Release pipeline: alpha, beta, release. Yes, yes, it is the project assemblies that differ among us, and not just their status. Product differences: different resources, presence or absence of settings, etc.
- Verification is the most capacious and technically complex part of the entire application assembly stage: static code analysis, unit testing, functional UI testing, localization checking.
- Deploy. Currently abstracted from the entire assembly, it seems to be on the side. Thus, if necessary, we can deploy any revision/branch/type of application to any environment (alpha, beta, release).
Assembly
Now we are developing three projects at once with a single code base, let's call them Project 1, Project 2 and Project 3. Of course, the differences between them are not as radical as between chess and a video player, since all three products belong to the category of email clients. However, they have different designs, there are differences in functionality, and they interact with the server differently. All this dictates its requirements for assembly, testing and product development.Feature Branch Workflow
Any build begins with a checkout of the project revision from the version control system. It would seem, why focus on this - after all, everyone can do a checkout? Really. But from which branch should this be done?We use Feature Branch Workflow to work on the product. You can read about this approach separately. Its main advantage for me is the isolation of changes. With this approach, each developer can, within the framework of a task, turn over at least the entire project, submit it for testing, and if QA gives approval, then the tested and functioning code will be included in the general branch. This approach minimizes the risk of a defect getting into the release, due to the fact that the sequence of actions is defined: first check, then merge into the main branch of the project.
To test these isolated changes, we must have a build on which we can run autotests, and which we will submit for manual testing for approval from the QA team. Bamboo provides the solution you need for this out of the box. It’s called Branch Plan and consists of defining a main branch for a build (for example, alpha), and all branches that match according to the specified template are considered as a feature branch. A clone of the build plan is created for them, but with the difference that the checkout will occur from this branch, and not from the main branch of the build plan. It looks something like this.

In the build plan view, we can switch between the main branch and existing branches, viewing the results of all local statuses.
The branch plan itself looks the same, except that it has a link to the task.

With such a flow, the thread inevitably begins to become outdated from the moment it was created. To detect conflicts with the main branch early so that the latest code is tested, you need to constantly update your branch during development. Bamboo can do this automatically before it starts building the project. In case of a conflict, the build will not be baked, and the developer will have to first update his branch and then push these changes. Then there will be no conflict before assembly, and everything will go as usual.
Product Flavors
Let's say we have a project that needs to be assembled in several variations, changing resources, code and configs. There are several options on how to implement this. We were guided by the fact that all build conditions, all configurations and other descriptive parts should be in the build script. In our case, Gradle is ideal for solving this problem. There is a good Android plugin for it, which allows you to flexibly configure most standard and non-standard parameters for assembling a complex project.Let's figure out how many assembly options we actively use and support.


Let's start with the fact that we have three main Product Flavors: Project 1, Project 2 and Project 3.
Product Flavor is a representation of a product branch. In most cases, these are different applications that have different packages, different signing certificates, different sources and resources. For each application we have several build options, namely:
- debug- signed with a debug key, can be debugged, not obfuscated;
- alpha/branch alpha- obfuscated assembly, differs in configs for analytics, crash assemblies, resources, debugging settings available in the application;
- beta corp- beta version, which has logs enabled, debugging mode available;
- beta- a build as close as possible to the release, which is distinguished by analytics, crash collection, has logs turned off, debug mode and does not have debug settings;
- release- production version of the application, almost all additional options are disabled, analytics and statistics collection are configured for combat projects in these systems, etc.;
- unit/UI testing- assemblies that have overwritten manifests, which allows, for example, to enable SMS reading permissions required for automated login testing (authorization, registration, two-factor authentication) using an SMS code.
8 Build Types * 3 Product Flavors = 24 Application Variants
Why so much? I'll try to answer. One of the typical challenges that you have to solve when you have three different products that are published to different environments is to separate analytics. And this must be done, otherwise the statistics from the alpha version of the application will distort the picture existing in production. We use HockeyApp to collect crash statistics. In it we have separate projects for different assembly options. This makes it easy to separate, for example, Project 1 crashes from Project 2 crashes, beta version from release version, etc.
In our project's build.gradle this config looks like this.
ProductFlavors (project1 ( ... android.buildTypes ( alpha ( hockeyApp ( ) ) beta ( hockeyApp ( ) ) publicBeta ( ... ) release ( ... ) ) project2 ( ... android.buildTypes ( alpha ( hockeyApp ( ) ) ... ) ) project3 ( ... android.buildTypes ( alpha ( hockeyApp ( ) ) ... ) )
This way we can configure different values for any build options. As for resources and sources, approximately the same principle is used here, with the exception of one feature: it is possible to merge resources from different options. Our project has resources that are the same for all applications - for example, the layout of the writing screen. If such files had to be copied into each resource package and kept separately, then when changing the layout of the letter writing screen, as many as three files would need to be changed. Fortunately, gradle + android plugin can merge resources.
I’ll tell you in a little more detail how this happens - perhaps someone will be able to solve their everyday problems using the same approach.
We have defined several folders with resources (all of them are in the root of the project).
- res- common resources for all application variants: here are common selectors, markups, themes, styles, etc.;
- res_project1- resources that are unique to Project 1: almost all graphics that are used in the application fall here, lines that contain the name of the project, specific logos or markup - in general, everything that relates only to Project 1;
- res_project23- here is a slightly different picture: in the res package _ project23 includes all resources that do not overlap with the Project, but are the same for Project 2 and Project 3. Such a grouping of resources helps solve the problem when the product of Projects 2 and 3 are very similar to each other, while being quite different from Project 1. Otherwise, I would have to copy the same resources to the res_project2 and res_project3 folders;
- res_project2- resources unique to Project 2: at the moment these are colors, graphics, texts. Everything else is in general packages;
- res_project3- similarly for Project 3, only a unique selection of resources for this application remains in this package.
As a result, for each build option we merge several packages to obtain a common set of resources for the application:
- Project 1 = res + res_project1;
- Project 2 = res + res_project23 + res_ project2;
- Project 3 = res + res_project23 + res_ project3.
SourceSets ( main ( manifest.srcFile "AndroidManifest.xml" java ( srcDir "src" exclude "**/instrumentTest/**" ) resources.srcDirs = ["src"] aidl.srcDirs = ["src"] renderscript.srcDirs = ["src"] res.srcDirs = ["res"] assets.srcDirs = ["assets"] ) androidTest ( manifest.srcFile "src/instrumentTest/AndroidManifest.xml" java.srcDir "src/instrumentTest/Java" ) project2 ( res.srcDirs = ["res_project2", "res_project23"] java.srcDirs = ["src_common"] assets.srcDirs=["assets_ project2] manifest.srcFile "res_ project23/AndroidManifest.xml" ) project3 ( res.srcDirs = ["res_project3", "res_ project23] assets.srcDirs=["assets_project3"] java.srcDirs = ["src_project3"] manifest.srcFile "res_ project23/AndroidManifest.xml" ) project1 ( res.srcDirs = ["res_project1" ] java.srcDirs = ["src_common"] assets.srcDirs=["assets_project1"] manifest.srcFile "res_project1/AndroidManifest.xml" ) testingUi ( manifest.srcFile "ui_testing/AndroidManifest.xml" ) )
There's just a little bit left to do. In the build project config you need to run the correct task in order to get the desired .apk, for example, gradle assembleProject1PublicBeta. Naturally, if there is such large number assembly options, we decided not to assemble them all sequentially, but to parallelize this process. In total, we received 6 parallel works that are carried out as part of the assembly stage. Each work publishes 3 artifacts per product.
I assume that those who have read up to this point have a question: why collect beta and release with each project build? The question is indeed very interesting. We did not come to this decision immediately, but after a long time. Historically, beta and release builds were built separately, using the same revision or a contract stating that the code was the same. Then we realized that this approach is fraught with many problems, and the most unpleasant one is that you find out the build status after you have decided to publish the beta. According to Murphy's law, naturally, the build turns out to be red. For any reason. The more changes, the more likely it is that they will negatively impact the build without us being able to do anything about it. You can only shorten the time interval between the moment an error is introduced and the moment it is detected. And ideally, do this in isolation from the general branch. If we abstract from the project and the build of the beta or release version and look at the automation process, then I now see one of the main indicators of the quality of the entire approach to automating the build process, probably, as the opportunity to find out about problems that have arisen as quickly as possible, and most importantly, to find out BEFORE how these changes got into the general branch.
Examination
Automatic quality check in mobile applications is definitely a trend of the last year. In my experience, for many this remains somewhat unrealistic. Everyone talks about it, but almost no one has seen it. We have been dealing with such tasks within the framework of our project for 2 years, and during this time we have already developed a fairly clear understanding of most of the subtleties that any developer has to deal with. All these problems and solutions are a fairly new and unestablished segment for mobile applications, although the web has long passed this path and has a sufficient number of standardized solutions.The first question that most people have is: what will we automate? The developer will answer: we will test the code, the manager will immediately begin to argue that the functionality needs to be tested. I believe that both need to be tested.
In general, if we talk about our application, then all checks are divided into several categories:
- Static analysis: I don't know why this approach gets so little attention, it's very powerful tool, which allows you to apply formalized rules to the entire project, and not to individual classes;
- UnitTesting: good old-fashioned unit tests to ensure that a class works exactly as the developer or user of that class expects;
- UiTesting: functional/end-to-end tests that check the end result: what the user will see and how he will work with it.
Static analysis
We use ready-made solutions as a static analyzer. For Android, this is Lint, which has recently become a very effective tool for monitoring the quality of Android-specific code, markup resources, graphics, etc. Among other things, it allows you to add your own contract-specific checks within a project. One such contract is that no layout-related parameters should be in styles. For example, properties layout_margin\layout_alignParentTop or something similar. From a syntax point of view, no one forbids putting these properties into styles, but in this case the style itself is used not to define the visual component of some UI component, but to store some values that then do not need to be written in the markup file. In other words, the style is used as a container for attributes. We decided that these are different things that should be separated, because, firstly, LayoutParams still relate to the markup, and secondly, they relate not to the control in whose tag these attributes are written, but to its parent in which he lies.If you look at it, in any more or less successful project that has guides for writing code, markup resources, and templates for solving problems typical for this application, there are quite a lot of such things. They can be tracked at the code review stage, documented, reminded of them every time at the beginning of the working day, or you can count on the fact that, once familiar with these wishes, everyone will follow them in the future. As they say, blessed is he who believes, but personally, it’s much calmer for me to work, knowing that I myself won’t forget about it and won’t miss anything, rushing to quickly close a boring task. You need to formalize such checks, add them to the build process with convenient reports, and not worry that when you take on a new task, you will suddenly find code that has missed all the checks, which will make your hair stand on end.
Writing your own checks is quite easy, even fun. As you add any static checks, a bunch of ideas immediately appear on how to statically identify some other problems. For Lint, guides and official documentation will help with this. You can develop rules directly in Android Studio.
There are also long-invented static analyzers for java code. I won’t list everything, I’ll just tell you that we use FindBugs. When we chose a tool, we wanted a convenient format, a sufficient number of rules by which the check would be carried out, and the ability to add our own rules. At the moment, we have written the necessary checks, such as checking for closed cursors, checking that the AccountManager instance is always obtained with an application context, checking that the required onEventComplete method is called when template uses of the event class, and others. Adding your own rules that will define intra-team agreements and prevent common errors due to inattention is an excellent practice that reduces the time for code review and testing, and also guarantees that such errors will at least not end up in the production version of the application in the future . As a guide to writing checks, we used the article FindBugs, Part 2: Writing custom detectors. It clearly shows how to create your own plugin, add detectors and use this in the verification process. The report is provided either in a formatted HTML document or in the form of an XML report, which briefly and to the point states in which class/method the error was found, error code, line, etc. This is usually enough to understand where you just didn’t clean up after yourself :-).
Wonderful, isn't it? A huge set of rules and common mistakes is already ready, there is also an opportunity to supplement it, all you have to do is find the courage and start using it.
One day I noticed that our project uses SNAPSHOT versions of libraries. Obviously, this is only valid in a task branch when these changes are made to the library being used. After the code is merged into the main branch, there should be no SNAPSHOTs in the project. In this case, the reason is quite prosaic and characterizes most of these errors. After the task was tested and it was decided that this version had achieved all the definition of done, the developer was so happy that he forgot to merge the library into the main branch, define new version this library and change the version in the main project. The problem is that neither Lint nor FindBugs can check the build script. Moreover, even if these checks are added to build.gradle itself, you need to know where this is acceptable and where it is not. Obviously, this is acceptable in a branch, in which the library is currently changing, but is unacceptable after it gets into the general branch. That's how we started using git pre-receive hooks to keep track of what's happening in the project at the repository level.
I know that many teams do not consider it necessary to spend time setting up rules suitable for the project at the version control system level, because “we are not fools, no one will delete all the branches in the repository,” or for some other reason reasons, for example due to lack of time. For us, this is a passed stage: we have come to the decision that it is better to spend a little more time, but be confident in the safety and quality of the product. Pre-receive hooks work very well for these purposes: we can detect that changes are being added to a shared branch, and check that the HEAD of that shared branch does not contain unwanted code. In the best case, no one will ever know about the existence of such a check, but, as practice shows, a random mistake is enough to create the opportunity to make a significant mistake. The pre-receive hook is perfect for checking all the corrected TODOs and FIXMEs that the developer willingly places, but forgets to fix. It also copes well with typical logging problems - adding the output of new Throwable() to all functions of interest to the developer, because a very complex bug was found in the branch that required a lot of details. For us, the ability to track mistakes made is automatically important for understanding that we will not step on the same rake again. Everyone makes mistakes, the only thing that matters is what conclusions you draw after that. Our conclusion is that in addition to correction, efforts must be made to ensure that these mistakes are not made in the future.
Unit Testing
Here, by and large, everything is ordinary. For some classes, tests are written that make sure that the class works exactly as intended, and at the same time show the class client an example of how it can be used. Currently, unit tests run on real devices but do not establish a real connection if necessary. Speaking of the need to establish a connection: when a developer thinks about how to test a particular module, most often the first thing he thinks about is how to replace class dependencies in order to isolate testing from the live environment. In the case of network connection This may seem like a difficult task, because network communication is not replaced by calling a single method, it requires hacking a whole layer of logic. For some time we resisted using a hook in the application code to override the server response and perform all subsequent actions with it. The fact is that this approach increases the risk that the code that will be tested is not the one that works in the production application. Every time the question arises whether it is worth changing the interface of a class for ease of testing, whether it is worth adding functions to the execution process additional conditions In order to “lock in” some dependencies, I try to adhere to the following position: first of all, all written code must be safe from the point of view of application functions. If additional conditions added to the code require separate verification, then tests do not need to do this. This is the main reason why we were not satisfied with a regular setter, which would simply replace the answer, take it from another source.As a result, we came to another decision, in my opinion, more honest. This is what one of the tests looks like, which checks that with a certain response the command produces the status “error_folder_not_exist”
@AcquireCookie @LargeTest public void testDeleteNonExistingFolder() ( DeleteFolder delete = runDeleteFolder(999); assertERROR_FOLDER_NOT_EXIST(delete); )
In this test, we make an honest request to the server, that is, the command works exactly the same as in the application. The problem is that the unit test depends on how the network is configured on the device it is running on. And below is the second test, which checks exactly the same thing, but this time substituting the desired answer, without executing an actual request and without interacting with the server.
@MockMethod(response = RESPONSE_NOT_EXISTS) public void testDeleteNonExistingFolderMock() ( testDeleteNonExistingFolder(); )
Thus, we have the opportunity to control the execution of tests - this is necessary, for example, so that the build status does not take into account the server response. We rely on the fact that the interaction protocol is described, and by making sure that the request is formed correctly (using unit tests, of course), we can be sure that the server will give the correct answer. And if the answer is correct, all that remains is to make sure that the application interprets it accordingly. However, for example, for a nightly build, it would be nice to also make sure that the contract for interaction with the server has not been violated. To do this, all tests will be launched, including those that actually interact with it. This will give us an additional safety net in case the contract for interaction with the server is broken due to some bug. We learn about this from test results, and not from user reviews in the market. If it is so important for us to test the functionality from start to finish, then we can make these tests the main ones and run them for each application build.
The fact is that we do not want to constantly depend on the service, but at the same time we need to monitor the situation and receive information in the form of daily reports that everything is fine, or that some part of the application is not in order. Here I prefer to separate our application and third-party services that are critical for its full operation, but are not our area of responsibility. We may encounter a performance issue in our application. third party service, but we can't fix it. Our job is to report the problem, wait for it to be fixed, and run tests on the service to make sure the problem is fixed.
UI Testing
From the user's point of view, these are the most honest tests. From a developer's point of view, they are the most difficult. The most honest because they test the final product, and not just some part of it. Blaming it on someone else will not work: any bug is an application bug, and it doesn’t matter what its cause is, the imperfection of Android in the crooked hands of another developer or something else. In any case, the error needs to be corrected. The advantages of such black-box testing include the fact that for us, in fact, it makes no difference how the functionality is implemented, what architecture the application has, etc. If two bugs in the application overlapped each other, and as a result the user saw the correct result - we are satisfied with it. If, in many cases, application bugs allow us to obtain correct results for the user, this suits us from the point of view of testing functionality.While unit tests check whether the code works exactly as the developer intended, UI tests are more designed to ensure that the product team ensures that user scripts are executed correctly in the application.
There are also bugs associated with user scripts. One of the best ways To fix an application bug, having received a script for its reproduction, write a test. Verify that the problem exists. Fix the problem in the application code (if necessary, accompany it with additional unit tests on the module in which any behavior was not closed) and make sure that the test now passes. In this case, there is no need to involve the entire bureaucratic apparatus, in which several people must approve that the bug is fixed, that nothing new is broken, etc. The whole point is that if the test is written thoughtfully, and precisely for the purpose of detecting and identifying the problem , then if it is successfully completed, there is already reason to consider the problem solved. The more such cases are closed by tests, the better the quality of the check, because the higher the likelihood that we did not miss anything.
Of course, doing all this is much more difficult than saying it. But first things first: let's start by choosing the framework on which we will build our tests. Again, I will not open America by writing that there are quite a lot of frameworks now, but it is impossible to recommend just one that will solve 99% of all problems. You can start writing your own ideal framework, betting that your hand curvature coefficient is less than that of your competitors, and hoping that in a month all your problems will be solved, and after six months, having calculated the cost of such a solution, return to this choice again. I don’t really like doing other people’s work, and perhaps that’s why I think this approach is utopian. I also see cross-platform testing as a utopia, because the differences between Android and iOS are too great. Writing one set of tests that will check both one application and another seems like an obvious solution only at first glance. Different navigation within the application, different layout within the same screen, different system behavior in response to minimizing the application, not to mention the fact that even the functionality may differ, because any high-quality product will take into account all the features of the platform in order to provide the user with the best experience.
Historically, we used Robotium in the project. This is a very well-known solution that is used by a large number of teams both in our country and abroad. It is interesting that all its users are united by a passionate dislike for this very framework. It is slow, unstable, and inconvenient to write tests on. But everyone nevertheless regularly returns to using it. Whether it's Espresso! It's as fast as the wind, as stable as the United States economy, etc. That's what the search giant's reputation does for the projects it takes under its wing. We've been writing on Robotium for 2 years, so I can pretty confidently say that the responsibility for instability and low speed lies rather with the client who writes these tests. Let's figure this out. The reason for speed problems often lies not in the imperfection of Robotium’s algorithms, not in its architecture, but in the fact that the tests contain abuse of the so-called Sleep Pattern. Its essence is that any problem can be solved by adding sleep(N * 1000) before the line where the problem was discovered. This is based on the following simple thing: Tests are executed in a thread other than the main application thread (UI Thread). Accordingly, synchronization that is performed using Sleep() is not good decision problems. Hence the result: wait even 10 seconds between steps in tests, the result will not be guaranteed. In Instrumentation-based tests there is a thing that waits for the application's UI Thread to finish operations that are currently in progress. The android.app.Instrumentation class has a method:
/** * Synchronously wait for the application to be idle. Can not be called * from the main application thread -- use (@link #start) to execute * instrumentation in its own thread. */ public void waitForIdleSync() ( validateNotAppThread(); Idler idler = new Idler(null); mMessageQueue.addIdleHandler(idler); mThread.getHandler().post(new EmptyRunnable()); idler.waitForIdle(); )
Using it, as we have experienced, solves most problems with the View not being found, although the screenshots show that everything is displayed, as well as with the View being in an intermediate state, animating its properties from one value to another and etc.
Naturally, stories that Espresso is many times better haunted us. The plan to switch to this framework has been ripe for a long time; In addition, Google is now paying quite a lot of attention to the issue of automated testing, so there are prerequisites that Espresso will develop more actively. The determination was also added by the Lead developer’s conviction that to switch from Robotium to Espresso it is enough to change TestRunner. We tried it and the tests actually worked. Now we can write new scripts without changing old tests at a time and still take advantage of all the benefits of Espresso. For us, this determined the transition to a new framework. We launched the tests and froze waiting for the results.
Espresso was indeed faster, although there were no dramatic changes. Now all our tests are divided into ~26 packages, and speedup was noticed in each. But the total changes in the speed of passing tests fall within 4%. In my opinion, this is not a significant advantage. Much more, from my point of view, makes it possible to write an analogue of waitForIdleSync for any wait in the application: not only for interface and animation tasks, but also for tasks of loading data from the network and from disk - for any interactions, the result of which we must operate by doing check in the test code. This feature is called CustomIdlingResource and it really makes Espresso stand out compared to Robotium. Despite the fact that the idea is very simple, namely, to provide the opportunity to register your own implementation of the idle state waiting interface, the custom idling resource allows you to manage synchronization between tests and the application. In this way, you can wait until all asynchronous operations have completed in the application, for example, which, together with the idle state of the main thread, indicates that the wait can be completed and checks of the application state can begin.
Naturally, Espresso is not a fairy genie. It can't solve all your problems, it can't write tests for you, and it can't handle the tasks of maintaining a test infrastructure, running tests, and collecting reports.
In addition to testing the actual functionality within an app, a common challenge faced in the context of automated quality testing is how your product interacts with other apps that may be installed on the user's phone. As an example, you can take, for example, Sharing from another application (for mail client this is quite relevant) or notification status bar. In both cases, the script affects another application that is running in a different process. All Robotium/Espresso-like frameworks become blind as soon as another process is involved. Fortunately, a solution that allows you to write cross-app functional UI tests already exists and is called UI Automator. If previously you would have had to choose between one framework or another or support different projects, each of which would be tailored for various checks, then with the release of the Testing Support Library, announced at the last Google I/O 2015 conference, we can combine the advantages of each approach and use the tools that are required in each individual case. This means that for an email client, for example, we can automate the following script:
- Launch the application, go to the list of letters.
- Open writing a new letter, enter the subject, recipient, attach attachments.
- Receive a push notification to your connected mailbox.
- Go to the notification and check the contents of the new letter.
- Exit the new letter screen using the back button. Make sure that we have returned to the letter writing screen and that all completed fields are saved.
Of course, all this seems simple only at first glance. Behind the scenes there was a bunch of collected rakes and stepping into the most unpleasant substances - at times it seemed that this whole idea simply could not be realized.
In the future, we will separately talk about how the infrastructure is built, how devices are ensured to be ready for work around the clock, how tests for different product flavors are distributed across different assemblies, how different implementations are tested depending on the version of the operating system, device form factor, etc. . After all, we have two long years of struggle with adb, usb, VirtualBox and many other tools and technologies. There is more work left ahead than has already been done, but we understand that all this was not in vain.
Mobile application development is always associated with the need to learn additional technologies. What if we reconsider the question and use already familiar tools?
For the first time, the 1C company tried to enter market mobile development in 2006. At that time, there was a real rush to automate the work of remote employees using PDAs. New programs for solving such problems appeared like mushrooms, and a vendor like 1C with successful products for automating various business areas could not miss the chance to enter a profitable market.
By mid-2006, the company presented the release of a new product with the promising name “1C: Enterprise 8. Extension for handheld computers.” 1C developers, who saw the prospects of the 8th platform, began to hope that now, using one tool, without much difficulty it became possible to carry out development for the mobile phone that was popular in those years operating system « Windows Mobile».
In practice, everything looked much worse. This tool did not allow us to implement original ideas. Plastic bag " Extension for handheld computers» was more of an addition for certain typical configurations than complete solution for development. There was no provision to expand the configuration functionality by adding new metadata objects. Very simple things were left to third-party programmers: creating new forms for user interaction, processing user events.
Yes, there were all sorts of workarounds for the restrictions, but even they didn’t allow for real development. In addition to technical limitations, consumers felt a serious financial barrier. Companies that decided to implement the solution from 1C were required to purchase productive PDAs, purchase licenses for Windows Mobile, and also pay 1C for the delivery of the solution and the final application.
The solution from 1C was too expensive. Companies accustomed to saving money continued to use alternative solutions. Moreover, the developers of alternatives managed to equip their products with functionality for interaction with standard 1C solutions.
Technical limitations and high cost did not allow the product to repeat the colossal success of the desktop platform. The idea to conquer the mobile market of the building.
applications failed miserably.
Step forward
The loss and losses from an unsuccessful project did not put an end to the development of a promising direction. In 2013, the 1C company introduced the first stable version of the new platform 8.3, which has the function of developing mobile applications.
1C completely rethought its approach to solving the mobile “theorem” and took into account the mistakes of the previous unsuccessful product. The result was absolutely new tool, which has nothing in common with its predecessor and is focused on the most current mobile platforms - Android and iOS.
Mobile applications in 1C style
To fully get acquainted with the development capabilities for mobile platforms, we will try to develop a small configuration. Using an end-to-end example, you can better evaluate the available functionality and decide on the possibility of using the 1C platform to solve problems.
To work, you will need the latest release of the 1C:Enterprise 8.3 platform. The educational version of the distribution is available on the official 1C website. There is more than enough to recreate an example of its capabilities.
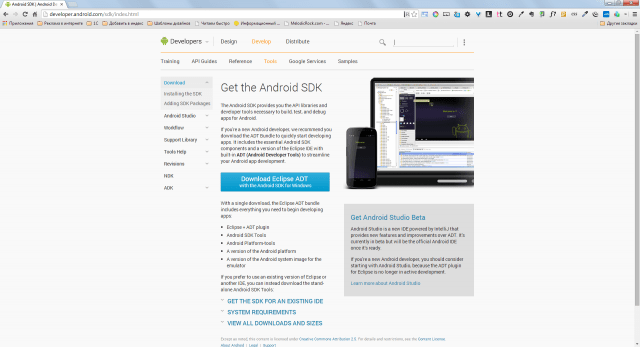
In addition to the 1C:Enterprise 8.3 platform, we will need a number of additional tools. This article will look at an example of developing an Android application. In this regard, you will have to download: Android SDK and Apache WEB server. The first component contains everything needed to build the application and an emulator for testing, and the WEB server is useful for quickly downloading the application to the mobile OS.
We will also require delivery of a “Mobile Developer Platform”. It contains a configuration to simplify the process of building the created mobile application, as well as a mobile developer platform. It must be installed on a mobile device or emulator.
To build an application ready for distribution via Google Play will need to download Apacheant And JavaJDK. This topic is beyond the scope of this article, so you can find out more about working with these tools and assembling the application in the corresponding section of my .
Configuring tools
Platform " 1C:Enterprise 8.3" and the Apache web server are supplied with installers and are installed in a standard way. Android SDK you just need to unzip it into a separate directory and run “ sdk manager.exe" A window will appear in front of you with a selection of available packages for installation. To test the example discussed in this article, you will need to select and install: Android SDK Tools, A ndroid Platform Tools, SDK Platform API 17.

The last step will be to create a new information base. For those who are not involved in development under " 1C:Enterprise“I’ll explain that any solution for this platform consists of an information base and configuration. Adding a new database is done by clicking the " Add» start window. After adding the database, open it in " Configurator».
First mobile configuration
In the main menu of the configurator we will find the section “ Configuration" and select "Open configuration". The configuration tree (the objects that will make up the future application) will be displayed on the left side of the window. Select the configuration root in it and press the key combination “ Alt+Enter" The properties editor will open in the right part of the configurator window.

Let's call the configuration " TODO" and in the "Purpose of use" property we indicate " Mobile device" Please note by doing last action, some configuration tree nodes will become inactive. Unfortunately, it is not possible to use all metadata objects on the mobile platform.

To solve our problem, we will need to create several metadata objects in the configuration tree:
 Procedure AddTask(Task) ExportRecordManager = CreateRecordManager(); RecordManager.Period = CurrentDate(); RecordManager.Task = Task; RecordManager.Status = Task.Status; RecordManager.Record(); End of Procedure
 Listing 2. Code of the function “Get List of Unclosed Tasks()”
Function GetList of UnClosedTasks() Export Request = New Request; Query.Text = "SELECT |TaskStatusSliceLast.Task AS Task, |TaskStatusSliceLast.Task.ExecutionDate AS ExecutionDate |FROM | Information Register.TaskStatus.SliceLast(&CurrentDate, Status<>VALUE(Enumeration.TaskStatuses.Completed)) AS StateTasksSliceLast | |ORDER BY | Execution Date DESC"; Request.SetParameter("CurrentDate", CurrentDate()); Return Request.Execute().Unload(); EndFunctionWe've sorted out getting data from the information register and recording it, now let's teach our directory how to work with the register. To do this, add a common module to the configuration tree with the name “ Working With Tasks" You can do without it, but I would immediately like to focus on the possibility of breaking the code into modules. Many 1C developers still neglect this recommendation and describe all the logic in one place, thereby complicating subsequent code maintenance. Let's create it in the module new procedure « Create NewTask"(see Listing 3).
Listing 3. Code for the “Create NewTask” procedure
Procedure CreateNewTask(Link) Export If Link.ThisGroup Then Return; endIf; Request = New Request; Query.Text = "SELECT |TaskStatusSliceLast.Status |FROM |Information Register.TaskStatus.SliceLast(&CurrentDate, Task = &Task) AS TaskStatusSliceLast"; Query.SetParameter("CurrentDate", CurrentDate()); Request.SetParameter("Task", Link); Result = Query.Run().Select(); If Result.Next() Then If Result.Status<>Link.Status Then Information Registers.Task Status.AddTask(Link); endIf; Otherwise Information Registers.TaskStatus.AddTask(Link); endIf; End of ProcedureBefore you create new entry a check is performed to see if there are already existing records for the task. If the record already exists, then you need to compare task statuses. If the status from the register does not differ from the status of the element being written, there is no need to create an additional entry.
As a finishing touch, let’s open the form of the “Tasks” directory item and create an event handler “ AfterRecordingOnServer" In it we will write a call to the procedure described in the third listing:
WorkWithTasks.CreateNewTask(CurrentObject.Link);
We are working on the interface
The main functionality of the application is ready - the user can create tasks, and each new task creates an entry in the periodic information register. Now let's move on to the interface. Let's bring work with tasks to the forefront. After all, it is logical to not display the list immediately after launching the application. closed tasks and the opportunity to create a new one?
Let's find the node " General forms"and add new uniform with the name " WorkDesk" Let's open the created form in the interface designer and add an attribute like " Table of Values" Let's call it “OpenZachi”. The table will contain two columns - “ Task"(Reference Link.Tasks) and " Execution Date"(Date).

The next step is to drag the added props onto the form. We should have an interface for a simple table. We won’t specify any dimensions; we’ll leave the worry of scaling the interface to the platform.
For the created table, in the property inspector, set the checkbox for the property " View only", and the property " Command Panel Position» set the value “No”. We will fill the table with dynamic information, so there is no point in editing it on the user's part.
Now let’s describe the “When CreatedOnServer” event handler for the form. Let's add one line of code to it:
OpenTasks.Load(InformationRegisters.TaskStatus.GetListofUnClosedTasks());
In the code, we refer to the procedure we described " Get the List of Unclosed Tasks” and the result of its execution is placed in the table.
Let's go back to the form designer and add a group of type “Regular group without display” with two buttons: “ Create" And " Update" Property " Grouping"For the added group, set the value to "Horizontal". To make the buttons more expressive, add images and change the default font.

Now select the button " Create" and give it the global command " Tasks: create" This will allow you to create tasks without entering the directory itself. By clicking the second button, we will update the contents of the table with tasks. To do this, you will need to create an additional form command.

All new form commands are created on the tab of the same name " Teams" The principle is simple - add new team, describe the action code in it and then associate the command with the interface, in our case with the button.
Don't forget that we are developing managed application, therefore it is necessary to clearly distinguish between client and server code. When the button is clicked there will be a context " OnClient", and we will receive data from the database from the server. In code it looks like this:
&On the Client Procedure UpdateTaskList(Command) UpdateList(); End of Procedure &On the Server Procedure When Created on the Server(Failure, StandardProcessing) OpenTasks.Load(InformationRegisters.TaskStatus.GetListofUnClosedTasks()); End of Procedure
Now let's define our desktop form as the home page area. Open the configuration properties (select the topmost node and click “ Alt+Enter") and for the property "Working area of the home page" set the value " One column", then add our form to the list " WorkDesk».

The application is completely ready and it's time to test it in action. Try running the example and creating several tasks with a status other than " Completed" The information register has been replenished with new entries (this can be viewed through the menu item “ All functions") and some of them are displayed on the desktop.
Landing on Android
The configuration works great on the desktop, and now is the time to test it on a mobile OS emulator. To prepare a new emulator, run the command interpreter ( cmd.exe) and go to the “toos” directory of the Android SDK distribution. Run the command " android.bat avd", which will launch the virtual manager Android devices. In it, click the “Create” button and in the window that appears, specify the parameters virtual device. In my work environment I decided to emulate Nexus S with Android version 4.2.2. (API Level 17).

After creating the device, we will immediately launch it. While Android is loading, let's return to the configurator and publish our application on the web server. In the main menu of the configurator, select the item “ Configuration» -> « Mobile application» -> « Publish" In the publishing settings window, we specify the name of the application (can be anything), the web server (in our environment there should be one) and the directory for storing the settings.


Specifying as the name " todo-mobile", the application will be available at the address - " http://host/todo-mobile" Click “ok” and try to access the published application using a browser. If successful, the server will return the XML code of the created configuration.

Let's return to the emulator and load the application with the mobile developer platform into it. The application file itself is available along with the delivery of the mobile developer platform and is called “1cem-arm.apk”. To install this application in the emulator, we will use the utility “ adb.exe" from directory " platform-tools»: adb.exe install –r 1cem-arm.apk.

After successful installation, open the list of applications in the emulator and launch the mobile developer platform. In the window that opens, click “ Add application" and in the "address" field we indicate the URL to our web server. I have this http://192.0.168.106/todo-mobile. Click " Add"and our configuration is successfully transferred to the mobile platform. The application is ready to use. Test the result and return to the configurator, it’s time to provide the applications with “mobile functionality”.


Sending SMS/MMS messages
Functions for working with SMS/MMS messaging is supported differently by mobile platforms. For example, when running an application on Android, the developer has the opportunity to subscribe to SMS and gain access to new messages immediately after receiving them. Unfortunately, this same feature is not available on iOS, so documentation should be at hand during development.
An object is provided for sending SMS messages SMSMessage. Let's look at an example:
&OnClient Procedure SendSMSMessage(Recipient, MessageText) NewMessage = New SMSMessage(); NewMessage.Text = MessageText; NewMessage.Recipients.Add(Recipient); Telephony Tools.SendSMS(NewMessage); End of Procedure
The code is quite simple and hardly needs comments. Now let's look at subscribing to incoming messages:
&On the Client Procedure ConnectMessageReceivingHandler() SubscribeToMessages = New AlertDescription("ProcessingNewMessages", ThisObject); Telephony Tools.ConnectSMSMessageHandler(SubscribeToMessages); End of Procedure &On the Client Procedure Processing New Messages (Message, Additional Parameters) // Processing a new message // Message. Sender, Message. Text; End of Procedure
Procedure " Processing New Messages" will be called every time a new SMS is received. Through the parameter " Message" an object of type " is transmitted SMSMessage» and we can easily obtain the text of the message and information about the sender.
Working with MMS messages is performed in the same way. First we create an SMS message, and then we add an attachment (for example, images) to it. With this simple action, an SMS turns into an MMS:
NewMessage= New SMSMessage(); Attachment = New MMSAttachment; Attachment.Data = Image; Attachment.ContentType = "image/jpeg"; MMSMessage.Attachments.Add(Attachment);
Making calls from a mobile application
A programmatic call is made using the “Dial Number” method of the global object “Telephony Tools”. Before calling the method, it is highly advisable to check the possibility of making a call:
If Telephony Tools.SupportedDialing() Then Telephony Tools.DialNumber(PhoneNumber, CallImmediately); endIf;
Parameter " Call Immediately» affects dialing performance. When it is equal to " True", dialing is performed automatically through the standard calling application. If set to False, the user will also see the standard dialer interface, but will need to press the button to make a call. Call».
Call log
The mobile platform allows the developer to interact with the call log. For example, you can easily get a list of outgoing, missed or incoming calls. This feature is only supported on Android:
Call Log = Telephony Tools.GetCall Log(); Selection = New DataComposition Selection; Selection Element = Selection.Elements.Add(Type("DataCompositionSelection Element")); SelectionElement.LeftValue = NewDataCompositionField("CallType"); SelectionElement.ComparisonView = ComparisonTypeDataLayout.Equals; SelectionElement.RightValue = CallLogCallType.Missed; SelectionElement.Use = True; List of CallLog Entries = CallLog.FindRecords(Selection); //The List of Call Log Entries will contain a collection of entries
Geopositioning
Almost any modern smartphone has geolocation functions. You can use this functionality from the built-in 1C language. Obtaining the current coordinates of the device can be divided into 2 stages: selecting a geopositioning provider and processing the received coordinates:
//Let's provide the choice of provider to the platform IdealProvider = Geopositioning Tools.GetMost AccurateProvider(); Coordinates = GeoPositioningTools.GetLastLocation(IdealProvider); //If the coordinates were received a long time ago, then update If Coordinates = Undefined OR CurrentDate() – Coordinates.Date > 3600 Then Geopositioning Tools.UpdateLocation(IdealProvider, 60); Coordinates = GeoPositioningTools.GetLastLocation(IdealProvider); endIf;
Working with multimedia features
The developer has the opportunity to take pictures, videos, and audio recordings using the built-in language: Take a Photo(), Make a video recording(), Make an audio recording().
Which mobile OS is better to develop for on 1C?
Despite my love for Apple technology, it is best to create mobile applications using the 1C platform for Android. There are several reasons for this, but the most important one is the supported functions. Unfortunately, many necessary things are not supported under iOS. For example, the inability to programmatically subscribe to SMS messages or interact with call logs may make it impossible to implement some ideas. Android is more friendly in this regard. Don't forget about the cost of the devices themselves. Not every company will be willing to splurge on an acquisition mobile devices from Apple.
Instead of completion
Platform " 1C:Enterprise 8» has proven in practice its readiness to become a simple tool for developing corporate development. Applications for mobile platforms. The examples discussed in the article are additional confirmation of this. It is not at all necessary to spend resources on learning native tools if the functionality of the application fits into the capabilities of the mobile platform and the company is dominated by 1C products.


