HDMI cable connections. Using a laptop as a computer monitor
HDMI (High-Definition Multimedia Interface) output is required for digital signal transmission high quality. It is used to broadcast video and sound. In this article we will tell you how to set up hdmi.
First of all it must be said that All modern video cards are equipped with this output. personal computers In addition, HDMI can be found on laptops, even on those models that use a built-in video card.
To begin with, it is recommended explore the capabilities of your video adapter. If your video card does not have an HDMI output, you can use the DVI channel using a special adapter, which is also called DVI-HDMI connector. A feature of such adapters is the ability to transmit an audio signal.
In order to set up HDMI, you will need to study technical specifications TV to which you are connecting. You should definitely make sure that it HDMI input is for receiving audio signal. To connect you only need HDMI-HDMI cable, one end of which is inserted into the computer’s video card, and the other into the TV connector.
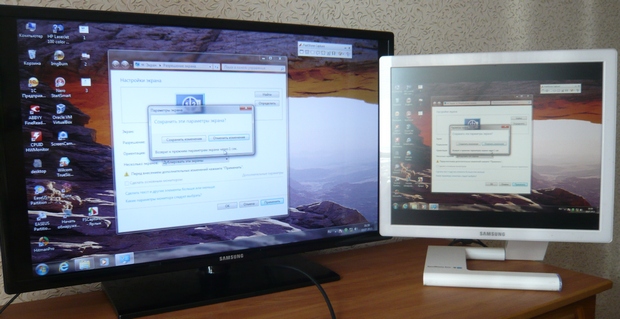
If you want the TV and monitor to work simultaneously, you need to set the option for these devices to work synchronously. To do this you need to open the menu "Start" and enter "Control Panel". Next you need to select "Screen" and click on the item "Screen Resolution Settings".
In the dialog box that appears, you must activate the function "Duplicate screen". Now the computer will transmit the same image to all devices. If you need both displays to work independently of each other, you should activate the "Expand screen". In this case, you will need to first designate the computer display as the primary device.
To set up HDMI, you also need adjust the sound signal transmission. To do this you need to open "Control Panel" and select item "Equipment and Sound". Next you need to click on. A dialog box will appear on the screen in which you should go to the tab "Manage audio devices". Here you need to note the equipment HDMI Output by clicking on its icon with the left mouse button, and then clicking on the button "Default".
Next you need to click on the button "Apply" and close the dialog box. Now, as a test, you can run a video and make sure that the HDMI output is working correctly. It is worth noting that when you disconnect the cable from the port, the standard audio port will turn on automatically.
As you can see, setting up the HDMI output is quite simple and does not require any special knowledge. Finally, it is worth talking about how to choose the right HDMI cable.
There are two types of such cables: to support high definition as well as to support HDTV resolution. As for the length of the wires, it can vary from 1 to 10 meters. However, it should be remembered that the longer the cable, the greater the likelihood of signal loss. Therefore, some manufacturers offer so-called active HDMI cables, which use various technologies to transmit data over long distances. When purchasing a cable, be sure to pay attention not only to the quality of the wire, but also to the connectors.
If you need to connect a second monitor to your computer, but you don’t have one, then there is the option of using your laptop as a display for your PC. This process is carried out using only one cable and a little configuration operating system. Let's look at this in more detail.
To complete this process, you will need a work computer with a monitor, an HDMI cable and a laptop. All settings will be made on the PC. The user only needs to perform a few simple steps:
- Take the HDMI cable and insert one side into the corresponding connector on the laptop.
- Connect the other side to a free HDMI connector on your computer.
- If one of the devices does not have the required connector, you can use a special converter from VGA, DVI or Display Port to HDMI. They are described in detail in our article at the link below.
- Now you should start the laptop. If the image is not transferred automatically, click on Fn+F4(on some laptop models, the button for switching between monitors may be changed). If there is no image, adjust the screens on your computer.
- To do this, open "Start" and go to "Control Panel".
- Select an option "Screen".
- Go to section "Customizing Screen Settings".
- If the screen was not detected, press "Find".
- In the popup menu "Multiple Screens" select item "Expand these screens".


Now you can use your laptop as a second monitor for your computer.
Alternative connection option
There are special programs, allowing you to remotely control your computer. Using them, you can connect your laptop to your computer via the Internet without using additional cables. One of the most popular programs is TeamViewer. After installation, you only need to create an account and connect. Read more about this in our article at the link below.

In addition, there are many more programs for remote access on the Internet. We suggest that you familiarize yourself with full list representatives this software in the articles linked below.
Many people who have a large plasma or LCD TV at some point think about connecting it to their computer or laptop. The opportunity to watch a movie on a big screen is of great interest to many users.
First let's get acquainted with possible ways connecting these devices, then we’ll figure out the video card settings, and at the end we’ll look at how you can output via HDMI sound. For the simplest connection of the above-mentioned devices, you only need to have an HDMI cable, the ends of which have the same connectors.

Any cable, even the most inexpensive one, is suitable, but keep in mind if you are going to use 3D mode, the cable version must be HDMI 1.4 or higher.
Locate the HDMI jack on your computer as well as on the back of your TV. This is what the socket on the back of the TV looks like:

And this is an image of a nest on the side wall:

But such a nest should be looked for on the back surface system unit computer:

This socket is located directly on the video card, next to the connector for connecting a DVI or VGA monitor. If a discrete video card is not installed in your system unit, the socket will be located on motherboard, near the USB ports.
It’s easier with laptops; the HDMI socket in them always looks the same, it’s just that in different models it can be located on different sides:

In portable computer devices(tablets, netbooks, cameras, etc.) install mini-HDMI connectors, which are three times smaller than a regular connector, and therefore require a mini-HDMI cable.
For many modern users The LCD TV is hung on the wall, which makes it difficult to connect a massive cable to its back surface. For such cases, cables are provided in which the plug is located at a right angle. You can also purchase a special HDMI corner if you wish:

Using this corner, you can connect to the TV from the back or the side. Some adapters even support the ability to adjust the angle and bend in them not straight, but in any direction. Before purchasing, decide in which direction the cable will come out after connecting it through the corner. Keep in mind that different models cables are oriented in different directions.
You will not be able to connect without HDMI connectors (however, if you have a DVI monitor connector, you can use an adapter DVI-HDMI).
So, to connect the computer to the TV via the HDMI connector, insert the cable all the way into both of these connectors. Before connecting, do not forget to disconnect both devices from the power supply if you do not want your HDMI port to accidentally burn out! Moreover, the coincidence of a number of negative factors can even lead to damage to your TV, computer or laptop!
If there are no free ports on your TV, you can purchase a “switcher” (a special HDMI switch). It connects to one of the inputs on the TV and supports connecting several sources at once, which you can switch between using a button or a separate remote control:

You don’t have to buy an expensive switch from an online store for $50-100 or more; regular Chinese models that don’t even need an external power supply also work great. More expensive models are needed only for those users who plan to watch movies in high definition 1080p.
HDMI setup
If you only connected one TV, the picture should appear immediately. Please note: in order for the picture to be displayed on the TV screen, the monitor must be disconnected from the system unit, and not just turned off!After Windows loads, select the appropriate screen resolution. To do this, right-click on an empty space on your desktop and then select the one that suits you " Screen resolution».

Here you can select the appropriate resolution. A higher resolution will provide a clearer picture, but everything on the screen will appear smaller. The system defaults to the maximum resolution supported by the device. If everything suits you, don't change anything. If you are not comfortable working with such a resolution: the font is too small and difficult to read, you can reduce the resolution, taking into account some nuances.
Some monitors and TVs are designed to display a strictly defined number of pixels vertically as well as horizontally. If you set a non-standard resolution, your TV will have to scale it in order to display it on its matrix, which can lead to blurring of the picture and deterioration in image quality.
If your TV supports Full HD resolution (1920x1080), it will reproduce 1280x720 no less well, but all fonts and details will be larger in size. Real TV resolution HD Ready is 1366x768, there is no point in setting the resolution to 1920x1080.
On the Monitor tab, located in " Additional options ", you can install required frequency screen updates. You can set it to 60 Hz or more (if your TV supports it):

If the video is not smooth enough or shakes when viewing, you can experiment with this parameter by changing its value. Set the color rendering quality to “True Color (32 bits)”.
Whenever you change the resolution, color depth or frequency, a window appears in which you need to confirm the changes. If your device does not work with the new parameters, you will not be able to see this window and confirm your actions. Don't worry, it will be restored in fifteen seconds previous settings systems of your computer device.
Features of setting up multiple displays
When connecting the TV and Windows monitor 7/8 will assume that there are multiple displays connected to the computer. There are 2 modes of simultaneous operation of several displays: cloning (duplication), as well as desktop extension. This option is selected in the same tab where you set the resolution.Screen mirroring
The cloning mode provides for displaying the same desktop image on both playback devices. To use this mode, it is desirable that the monitor and TV have the same resolutions, otherwise one of the devices will have to work with inappropriate settings. At least the devices must belong to the same format (for example, both are widescreen). If the monitor is square (5:4 or 4:3) and the TV is widescreen (16:9, etc.), to the right and left of The pictures on the screen will have black bars.Desktop extension
This mode makes it possible to have 2 desktops or more. That is, if both used displays are installed side by side, when moving, the mouse cursor will move from the TV to the monitor and back.The system assigns each of the connected devices its own number, displayed in front of its name. If you cannot figure out which device is under which number, press the “Detect” button, after which a digit with its number will be displayed on each display:

At the top you can see pictures of devices with numbers printed on them, indicating the location of these displays in space. By dragging these images with the mouse, you can change their order. Using the appropriate checkbox, you can make any of the connected devices the main monitor.
For a computer and connected to it via HDMI TV You can adjust the frequency and screen resolution separately. In settings AMD video cards(ATI), NVidia, etc. have their own capabilities related to installing multiple displays. For example, when using a video card NVidia GeForce right click on free space desktop, then select the line “ NVidia Control Panel" You can configure your monitors in the “Display” section:

How to output sound to TV via HDMI?
 After this, the problem with audio output via HDMI to the TV should be resolved. All you have to do is restart the programs you are using or completely restart your computer. I answer all questions in detail.
 Friends! Everything you do on the computer, watch movies, cartoons, chat on Skype, play, view photos, slides or Internet pages in a browser, all this will be shown on the screen of your TV if the TV is connected to the computer via an HDMI cable. Nowadays, almost any TV has an HDMI input, and most produced video cards have an HDMI output.
The HDMI interface was invented in order to connect two high-tech digital devices(they are undoubtedly your computer and TV) and transfer information from device to device without loss of quality. Such transmitted information may include an image and multi-channel high-quality sound. If you have a movie or cartoon on your computer, in any HD, Blu-ray or AVI, MOV, MPG, MP4 format, then you can watch it all on your TV. There are slides or photos, please look. I’m not talking about games, because I’m not a supporter of them; they take up a lot of time from young people, which can be spent on studying. We connect the TV to the computer via HDMI with a second monitor To connect the computer to the TV we will use an HDMI cable, it looks like this and can be up to 20 meters long, choose the cable of the length you need.

For example, let’s take a Samsung TV, a not entirely new 4 series (LED type), purchased several years ago, but it already has two connectors for connecting HDMI devices.

The computer that you and I will use to connect to the TV was also purchased about three years ago, with Nvidia video card and also with an HDMI connector.

As I already said, our TV has two HDMI connectors. With the TV turned off, connect the HDMI cable to the HDMI 2 connector,

Connect the other end of the cable to the HDMI connector of the video card. desktop computer. The computer, in turn, is already connected to the monitor (also Samsung SyncMaster 971P) with a DVI cable.

We turn on the computer and TV. There may not be an image on the TV right away; instead, we see this message: “Cable not connected” “Check cable connections and source parameter” or “Weak signal or no signal”

On Samsung TVs, to display a list of all available video sources, you need to press the Source button on the remote control.

A menu appears on the TV, in this menu, using the remote control, select the HDMI 2 connector,


Now, on our TV, an exact copy of our computer’s desktop should appear. But again there is nothing, the same error appears on a black screen. So we go to the “Screen Resolution” settings. Right-click on the desktop and select “Screen Resolution”.

As we can see in the window that appears, our main screen is set to the second (2) Samsung SyncMaster 971P monitor, and in the “Multiple Screens” parameter we have set “Display the desktop on only 2 monitors”, which is why the image is only present on the computer monitor screen, but it's not on the TV

We bring everything in this window to this state. Select a parameter
Multiple screens: "Duplicate these screens"
In the “Screen” parameter, “Multiple monitors” is automatically set, click Apply and OK.

The desktop of our computer appears on the TV.
The resolution of our small Samsung TV is 1366 x 768. If your computer monitor supports this resolution, then it will automatically be set to the same resolution of 1366 x 768. If not, then either the TV or monitor will have the wrong resolution. For example, my Samsung SyncMaster 971P monitor has a maximum resolution of 1280x1024. When using a TV and a computer monitor at the same time, the main thing for me is to set the resolution on the TV correctly, otherwise why would I connect it then. I put it on Samsung TV The resolution is 1366 x 768, the image is perfect.

And on a computer monitor such a resolution of 1366 x 768 looks like this.

And nothing can be done here. If you want the perfect image on your TV and computer monitor, then they must support the same screen resolution, that is, have the same characteristics. There is no sound on the TV after connecting the TV to the computer via HDMI Friends! Don't forget that the HDMI interface transmits video and sound over one cable, and we can specify in the operating system settings to use the TV's built-in speakers for sound output.
Let's fix the problem by using a TV instead of a monitor. Go to Start->Control Panel->

Hardware and Sound->Sound

If you don’t have anything in this field, right-click on an empty space and in the menu that appears, check the “Show disabled devices” items. "Show connected devices"
Now we look at the name of our TV, in my case it is Samsung, we need to turn it on and turn off the rest. Right-click on Realtek and select Disable.

We also turn off the speakers.

Samsung – Enable, Apply and OK.
HDMI is a popular connection connector various equipment between themselves (for example, a computer and a TV). But when connecting, various kinds of difficulties may arise - technical and/or software. Some of them can be solved on your own; to eliminate others, you may need to send the equipment in for repair or replace a faulty cable.
If you have a cable with any intermediate adapters, for example, you can use it to connect to a DVI connector. Instead, it is better to try using a regular HDMI cable operating in HDMI-HDMI mode, since the TV/monitor may not accept a cable that implies the ability to connect to several ports simultaneously. If the replacement does not help, then you will have to look for and eliminate another cause.
Check the HDMI ports on your computer/laptop and TV. Pay attention to these defects:
- Broken and/or rusted, oxidized contacts. If any are found, the port will have to be replaced completely, because contacts are its most important component;
- Presence of dust or other debris inside. Dust and debris can distort the signal, which will cause inconvenience when playing video and audio content (low or no sound, distorted or slow images);
- Review how well the port is installed. If it begins to loosen at the slightest physical impact, then it will have to be fixed either independently or with the help of specialized service workers.
Perform a similar check on the HDMI cable, paying attention to the following points:

You need to understand that not all cables fit all HDMI connectors. The latter are divided into several main types, each of which has its own wire.
Method 1: Correct TV settings
Some TV models are unable to independently determine the signal source, especially if some other device was previously connected to the TV via HDMI. In this case, you will have to enter all the settings again. The instructions for this case may vary slightly depending on the TV model, but its standard version looks something like this:

For some TVs, the instructions may look slightly different. In the 2nd point, instead of the suggested options, enter the TV menu (the button with the corresponding inscription or logo) and select the HDMI connection option. If the TV has several connectors of this type, then do the rest in accordance with points 3 and 4.
If this method does not help, use the instructions for the TV (it should tell you how to connect via an HDMI cable to this particular device) or pay attention to other ways to solve the problem.
Method 2: Setting up your computer
Incorrect configuration of a computer/laptop with multiple screens is also the reason why an HDMI connection is ineffective. If you do not have any external displays connected to your computer other than your TV, then this method can be ignored, since problems arise if another monitor or other device is connected to the PC or laptop using HDMI (sometimes other connectors, for example, VGA or DVI).
Step-by-step instructions for setting up multiple screens for devices running Windows 7/8/8.1/10 look like this:

It is worth remembering that HDMI is capable of providing a single-stream connection, that is, correct operation with only one screen, so it is recommended to disconnect the unnecessary device (in this example, the monitor) or select the display mode "Display desktop 1:2". To begin with, you can see how the image will be broadcast to 2 devices simultaneously. If you are satisfied with the quality of the broadcast, then there is no need to change anything.
Method 3: update the drivers for the video card
Initially, it is recommended to find out the characteristics of your video card, since some graphics adapters are not capable of supporting image output to two displays at once. You can find out this aspect by looking at the documentation for your video card/computer/laptop or by using third-party software.
First, update the drivers for your adapter. You can do it like this:

You can also download and install drivers from the Internet, always from the manufacturer’s official website. It is enough to indicate the adapter model there in the appropriate section, download the necessary software file and install it following the instructions.
Method 4: clean your computer from viruses
Most often, problems with signal output from a computer to a TV via HDMI arise due to viruses, but if none of the above helped you and all cables and ports are working properly, then the possibility of a virus penetration cannot be ruled out.
To protect yourself, it is recommended to download and install any free or paid antivirus package and regularly use it to check your PC for dangerous programs. Let's look at how to run a PC scan for viruses using Kaspersky antivirus (it's paid, but there is a demo period for 30 days):

Problems with connecting a computer via HDMI to a TV rarely arise, and if they do occur, they can always be solved. Provided that your ports and/or cables are broken, you will have to replace them, otherwise you won’t be able to output anything.


