Windows Safe Mode. Safe mode
This article is for those who have ever heard the concept of “Windows Safe Mode” in the computer field, but are not aware of what it even means, what it is for and how to enter this very mode. And the thing, in fact, is sometimes very useful and can help out in case of problems with your computer. It is, in general, designed as a diagnostic mode and, moreover, launching this mode is not at all difficult. Let's take a closer look at what this mode is, what it's for, and how to launch it!
What is Safe Mode and why you might need it
Safe mode is available in every Windows operating system and during normal operation of the system, without any failures, you will not see this mode anywhere. You won’t be able to switch to it just like that by accident. This mode is one of the Windows diagnostic modes, of which there are several.
By starting Windows in safe mode, you will see a regular operating system, but with a simplified graphical shell, i.e., any themes, desktop backgrounds, and other complex graphics will not work. But the most important thing is that only the most basic, vital for Windows services, and all programs that start automatically when Windows starts will be turned off. Here's an example of Windows 7 running in safe mode:
There will be no fundamental differences in other versions of Windows.
What will running the system in this mode with severe functionality limitations give us? After all, most of the services will not work, which means that even many programs will not be able to start. But you need all this if Windows won’t start in normal mode. Reasons not Windows startup in standard mode there can be completely different problems, from ordinary errors in the operation of the system, to all sorts of virus infections and glitches/failures of computer components. If Windows does not start due to a malfunction or malfunction of some device inside the computer, then safe mode is unlikely to help you, because in this case it will most likely not start either. However, it’s still worth a try, especially since you can’t immediately determine what the problem is: the computer’s hardware or its software part!
In cases of failures in the computer software, safe mode can often help out. Suppose you installed some incompatible driver on some device and after rebooting, Windows stopped starting in standard mode, for example, it displays blue screen death (this is what they usually call a blue window with incomprehensible inscriptions when trying to boot Windows) or something else. In this case, first of all, you can try to boot the computer in safe mode, because, as I wrote above, only everything that is most basic and necessary for the system will start there, and as a result, Windows can start in this mode. Well, then all that remains is to use this safe mode to find the reason why Windows refuses to start in standard mode. For example, remove a faulty driver or some program, clear viruses, etc.
In safe mode, you can run your anti-virus scanner to clean your computer of viruses, you can run the program built into Windows to restore the system to one of its earlier states (for example, a few days before the crash occurred), and also use other programs and built-in Windows tools.
How to enter Windows Safe Mode
Now that you understand in general what safe mode is for, it’s time to move on to the process of entering this mode. There is basically nothing complicated here, but the process for entering this mode may differ depending on the version of Windows you are using.
Typically there are 3 types of safe modes:
Safe Mode. This is the standard version of safe mode, in which the most necessary programs are launched. Windows operation services and programs and even network drivers do not load, i.e. in this mode you will not be able to access the Internet;
Safe Mode with Boot network drivers . It differs from the standard safe mode in that network drivers are additionally loaded, which will provide you with access to the Internet through this mode;
Safe Mode with support command line . It differs from standard safe mode only in that immediately after its launch, the Windows command line (i.e., the console) will also be launched.
In case of problems, I recommend using first of all the standard safe mode (in the window it will be called “Safe Mode”), since the network-enabled mode can again cause a failure, because you don’t know what exactly is wrong, maybe just network drivers. Well, launching the command line can’t help much; perhaps only administrators who know most of the service commands can use it.
Entering Safe Mode on older versions of Windows: Windows XP, Windows Vista, Windows 7
To enter safe mode on Windows systems XP, Vista or 7, you need to restart your computer first. If it's off, just turn it on.
In this window, your mouse will not work and you will only be able to move around the window using the arrow keys on the keyboard. So, use the Up and Down arrows on your keyboard to select Safe Mode and press the Enter key to launch.
In a few seconds, safe mode will start!
Entering Safe Mode on Windows 8 and 10
On Windows 8 and 10, entering safe mode is implemented a little differently. If something happens to your computer and it does not boot in normal mode, then these systems will automatically offer one of the solution options, including starting in safe mode. That is, for example, your system suddenly did not start in standard mode. In this case, the computer will reboot and a special service will start. Windows program, where to launch Safe Mode you need to select "Boot Options":
Your mouse should work in this window, so you can use it to select menu items.
In the next window, click the reboot button:
The computer will reboot and a window will appear where you need to use the F1-F9 keys to select desired mode launch.
Safe mode is numbered 4, so to launch it, press F4 accordingly.
That's the whole process of starting safe mode if there is something wrong with your Windows 8 or Windows 10 system and it does not boot in standard mode.
But for some purposes you may also need to start safe mode even when your system successfully boots in standard mode. For example, you want to scan your computer for viruses from safe mode, which is a more reliable method of scanning, or you want to remove something that cannot be removed through standard mode. In this case, you need to activate the launch of special options Windows boot directly from its interface.
Enabling special boot options in Windows 8
Press the key combination WIN + I. The settings panel will appear on the right, where at the bottom we click “Change computer settings.”
In the next window, select “Update and Recovery”.
In the next window, on the left, select “Recovery” (1) and on the right, click “Restart now” (2) under the heading “Special boot options.”
Conclusion
Now you have learned what safe mode is in Windows and how you can start it on different versions this operating system. This mode can sometimes be very helpful, because you can try to fix something in it if the system does not boot in normal mode.
Have a nice day and good mood! Bye;)
Any computer running the Windows operating system can be started in safe mode. In this mode, only the most basic components of the operating system are loaded. This allows you to start your computer even if serious software conflicts or problems occur. From safe mode you can remove programs that block the operation of the operating system or cannot be removed during normal operation.
If you are having problems and need to start your computer in safe mode, then this material should help you. Here you can find out how this is done in the Windows 7 operating system, as well as the new Windows 8 and operating systems.
How to start your computer in safe mode (Windows XP or Windows 7)
If you are using Windows XP or, then starting your computer in safe mode will be quite simple. To do this, you need to restart the computer (if the computer is turned off, just turn it on) and when the computer starts booting, press the F8 key on the keyboard. You need to press the F8 key until a list of ways to boot Windows appears on the computer screen.
IN this list we are only interested in the first three points. Let's look at them in more detail:
- Safe Mode– standard safe mode. In this mode, the computer will start using only the most necessary components. In most cases, this is the safe mode option that is used.
- Safe mode with loading network drivers– safe mode is similar to the previous one, but with loading of network drivers. When loading in this mode, you will be able to work with local network and the Internet.
- Safe Mode with Command Line Support– safe mode without GUI. After loading in this mode, a command line appears on the screen with which you can interact with the system.
Please note that the F8 key must be pressed immediately after the computer starts up. If you are a little late, the list of boot methods will not appear and the computer will start in normal mode.
How to start your computer in safe mode (Windows 8 and Windows 10)
If you are using Windows 8 or, then you will not be able to start your computer in safe mode using the method described above. The computer simply won't respond to the F8 key. In this case, you need to start safe mode using the MSCONFIG command or using boot disk with Windows. We'll look at both of these options next.
Option #1: Start the computer in safe mode using the MSCONFIG command.
If your computer is in working order, then you can use the MSCONFIG command. Press combination Windows keys-R and enter the MSCONFIG command in the window that appears.

After this, a window called “System Configuration” will open in front of you. In this window, you need to go to the “Boot” tab and check the box next to “Safe Mode”.

After that, close the window by clicking on the “OK” button and restart the computer. The next time you boot your computer, Safe Mode should start. In order for the computer to boot again in normal mode, you need to go to MSCONFIG again and uncheck the box.
In principle, this option for starting the computer in safe mode works in both Windows XP and Windows 7. But, using it is not as convenient as starting it via the F8 key.
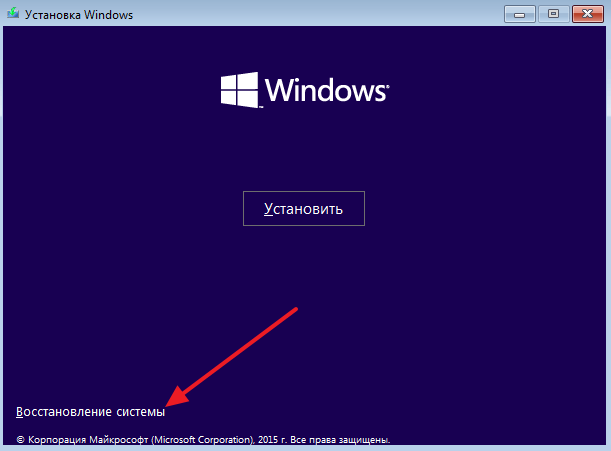
Option #2: Start your computer in safe mode using a Windows boot disk.
The second option is to start safe mode using a Windows boot disk. This option will be useful if your computer does not start at all, and it is not possible to use the MSCONFIG command.
For this download option you need with that Windows version, which is installed on your computer. If it is Windows 8, then you need a boot disk with Windows 8, if it is Windows 10, then Windows 10.
Insert your Windows boot disk and boot from it. At the very beginning, a window will appear in front of you with a choice of language. Here we simply click on the “Next” button.


And open the subsection “ Additional options».

After this, open the command line.

As a result, it should appear in front of you. In this line you need to enter the command “ bcdedit /set (globalsettings) advancedoptions true" After entering this command, simply close the command line by clicking on the button with the red cross.

After closing the command line, the Select Action menu will appear. Here we select the “Continue” option.

After this, the computer should reboot. After rebooting, boot the computer in normal mode (not from the boot disk). As a result, when you start your computer, a list of ways to boot Windows will appear on the screen, with which you can start Safe Mode.

It should be noted that now, every time you start your computer, a list of boot methods will appear. In order to disable it, you need to boot from the disk again, go to the command line and run the command “ bcdedit /deletevalue (globalsettings) advancedoptions».
In Windows 7, there are two ways to get into safe mode:
1) Entering Windows 7 safe mode at system startup.
2) Entering Safe Mode from the Windows 7 environment (from a running OS by changing the boot in System Configuration).
Entering Windows7 safe mode at system startup.
Turn on the computer and while the system is loading, press the F8 key several times; if the welcome window appears (Windows 7 logo), it means you did not have time to press the F8 key, in this case you need to wait for the system to boot and turn off the computer again and when loading, press again F8 key. When trying to get into safe mode, you need to consider:
- On some keyboards, the function keys F1–F12 are always disabled by default. To turn them on, you need to press a special key (usually Fn) and while holding it, press the F8 key.
- If your computer has two or more operating systems, use the arrow keys to select the one you want, and then press Enter.
- To use the arrow keys on the numeric keypad, Num Lock must be disabled.
In the window Additional download options select " Safe Mode" and press the key " Enter».
After a few seconds, the system will boot into safe mode.
Entering Safe Mode from Windows 7.
Press the button " Start" and write in the search bar msconfig and press the " Enter» 
In the window that opens System Configuration, go to the “” tab and check the “ Safe Mode" and select " Minimum».
For reference:
Safe Mode: Minimum- Loading the Windows GUI ( Windows Explorer) in safe mode with only the most important running system services. Network components disabled.
Safe Mode: Another Shell- Loading command Windows strings in safe mode with only the most important system services running. Network components and GUI are disabled.
Safe Mode: Recovery Active Directory -
Loading GUI Windows user in safe mode, running only the most important system services and the Active Directory directory service.
Safe Mode: Network- Boots the Windows GUI in safe mode, running only the most important system services. Network components are enabled.
Without GUI - While loading Windows screen no greeting is displayed.
Download log - All information regarding the boot process is saved in the file %SystemRoot%Ntbtlog.txt.
Basic video- Boots Windows GUI in minimal VGA mode. This mode loads standard VGA drivers instead of display drivers that match the computer's video hardware.
OS information - Displays the names of loaded drivers during system boot.
Make these boot options permanent - Changes made to system settings are not tracked. You can change the settings later using System Setup, but only manually. If this option is selected, you will not be able to roll back changes by selecting Normal Startup on the General tab. 
After this, you will be prompted to restart your computer to enter Windows 7 safe mode. If you want to boot into safe mode now, click "", if you want to do this later, select " Exit without reboot"And the next time you reboot or turn on your computer/laptop, automatically boot into safe mode.

The next time you boot Windows 7, the system will boot into Safe Mode.

In order not to boot into safe mode, you need to go into the system configuration again and uncheck the previously checked boxes.
OS failures most often occur after incorrect configuration, installation of unfinished programs or virus infection. Booting into Safe Mode will show you whether these are the issues and, if so, help resolve them.
How to start Safe Mode in Windows
1. Using hotkeys
- Suitable for Windows 7, Vista and XP.
Restart your computer and, as soon as the system starts to boot again, press the F8 key until a menu of additional boot options appears. When this menu appears on the screen, select the Safe Mode option and press Enter.
To exit Safe Mode, restart your computer and it will start normally.
- Suitable for Windows 10, 8, 8.1, 7, Vista and XP.
Use the Windows + R key combination. In the window that appears, enter the command msconfig and press Enter. When the system configurator window opens, go to the “Boot” (or BOOT) tab and check the “Safe Mode” (or SAFEBOOT) checkbox. Click OK and restart your computer.
To disable booting in safe mode, open the configurator window again, uncheck the “Safe Mode” checkbox and restart the computer.

Click on the notification icon in the lower right corner and go to “All settings” → “Update and security” → “Recovery”. Under Special Boot Options, click Restart Now.
Once on the “Select Action” screen, select “Troubleshooting” (or “Diagnostics”) → “Boot Options” (if this item is not displayed, click “Advanced Options”) → “Restart”. On the next screen, press the 4 key to select the Enable Safe Mode option.
To exit safe mode, simply restart your computer.
- Suitable for Windows 10, 8 and 8.1.

This method is a simplified version of the previous one. Hold down the Shift key and click on the soft reboot button that you use to restart the system normally. When you get to the Select Action screen, follow the steps outlined for that window in the previous method.
To exit Safe Mode, simply restart your computer.
How to start Safe Mode on macOS
1. Using the Shift key
Hold down the Shift key immediately after turning on or restarting your computer until you see the login window.
To exit Safe Mode, simply restart your Mac without pressing any additional keys.
Open Finder → Programs → Utilities and launch the Terminal utility. Type sudo nvram boot-args="-x" and press Enter. After this, restart your computer.

To disable booting into Safe Mode, launch Terminal again, type sudo nvram boot-args="" , press Enter, and restart your Mac.
What to do next
In safe mode, only the standard set services, drivers, settings and programs. If everything works fine, then there is probably something wrong with third party programs or recently changed OS settings.
In this case, you need to scan your computer with an antivirus and remove suspicious software directly in safe mode. If this doesn't help, you should consider restoring macOS to normal.
If problems with your computer occur in safe mode and even restoring the OS does not change the situation, most likely there is something wrong with the hardware. First of all, make sure that the components do not overheat and, if necessary, clean the computer. If the temperature is normal, contact the service center.
A new smartphone or tablet based on Android always works without failures or glitches. But what to do if, in further use, the device suddenly “slows down”, its speed slows down, applications do not work correctly, the sensor reacts unstably? Such problems can be resolved by enabling Safe Mode. On a device running Android, Safe Mode will make it possible to determine why problems are occurring.
If the phone works normally in safe mode, then “glitches” with it occur due to some application.
How to enable: 3 ways
Of all the inclusion methods, the most relevant, perhaps, are the following:
Method 1
Method 2
- Turn off your phone.
- When an inscription corresponding to the name of the smartphone brand or the inscription Android appears on the display, you must press the volume up button.
- In this case, after turning on, the words “Safe Mode” will appear at the bottom of the screen.
Method 3
If the above methods do not work, then try this:
- The device needs to be turned off.
- While booting, hold down the Volume Down button.
- After this, safe mode will be activated.
Note: in some versions of Android, to switch to Safe Mode you need to restart your smartphone manually, and when the operating system logo appears on the screen, you need to press the volume up and down buttons and hold until full load devices.
How to disable: 2 options
No less pressing is the issue of disabling safe mode. Before this, you need to restart the device, and then use one of the suggested options.
First shutdown option
- The phone turns on, after rebooting, Safe Mode is automatically disabled.
- If safe mode does not automatically reset, you need to uninstall the last application that was installed; to do this, select Settings from the application menu.
- When you select this application, you will be offered the Delete option. This is precisely the point that needs to be touched upon.
- After completing these steps, reboot your device.
Second shutdown option
If the first method did not give the desired result, then you can try the second method - resetting to factory settings:
- First, you need to select the Settings item from the menu, and in the expanded menu, touch the item Backup and reset settings.
- In the proposed menu, select Reset to factory settings, then Reset smartphone/tablet.
- Delete everything. After this, the device will be as good as new. But keep in mind that everything installed applications and personal data will be deleted. Only the factory settings installed by the manufacturer will remain.
Thus, Safe Mode loads only the required number of programs and utilities, only the necessary components. It is for the security of user data that the manufacturers developed the above mode, and applications will only work those installed by the device manufacturer. All other programs that were installed by the user themselves may pose some threat and will therefore be disabled.
Even if serious problems occur in the phone, and in standard mode it no longer performs its basic functions, it can still work in safe mode. For example, if the battery starts to discharge too quickly or the call button does not work, before sending such a device for repair, you can check its functionality in this service mode.


