Meta for OS X. Universal music tag editor
Individual files or entire folders has become one of the main features of OS X Mavericks. The presence of tags has taken file navigation to a whole new level: for example, you can assign a red tag to all documents, regardless of their location on the computer, and then get instant access to them by clicking on the corresponding tab in the Finder.
Adding tags is not difficult - to do this, you just need to go to the file menu and select one or more existing tags for it. But what if you want to tag hundreds or thousands of files at once? You won’t have enough time or energy to do all this manually.
Fortunately, Apple anticipated this situation in a timely manner, which is why Finder has a bulk tagging feature. It works very simply, but not everyone knows about this “trick”.
To assign one tag to an entire group of files, you need to first select them, and then drag them onto the tag you like directly in the left Finder menu. If the number of files exceeds several thousand, the procedure may take some time, in other cases everything happens instantly.

Your documents, photos and music will not go anywhere - they will remain in the same folder where you last left them. It’s just that from now on it will take much less time to find them, especially if the files are located in different directories.

For me personally, tags in Finder have been a real godsend. This tool is very helpful in sorting files and at the same time much more effective than combining them into one folder, as most users do.
Became officially available for download
Tags are a great way to organize your data and make it easier to find. Tags automatically appear in side menu Finder, so files tagged with them are easy to find regardless of their location. You can mark with color tags various documents, such as photos you need to edit, drafts, saved articles to read over the weekend, videos, etc.
In contact with
Function " Tags» in macOS allows you to combine different types of files in one section, as well as use multiple tags to categorize them.


On the " Tags"on the way Finder → Settings You can change any of the tags, create favorites, and organize their display in the sidebar.

You can also remove an unnecessary tag by right-clicking on it and selecting “ Delete».

How to create, edit, and delete tags in Finder
Adding tags from the context menu
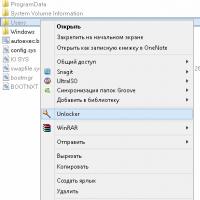
To add a tag to a file, right-click on it and select " Tags» in the menu that appears.

In the text field, select a tag from the existing ones or enter your own tag and press the key twice Return(Enter).


Add multiple tags to one file
If you want to add multiple tags, after each entered tag, click Return(after the process is completed, you also need to click Return, otherwise the tags will not be saved).


You can also tag a file with tags that already exist in the list. To do this, just open context menu and select the ones you need from the list provided.
Remove tags
To remove an unnecessary tag, click on it and select it in the “ Tags" and press the key Delete. In fact, this action will not remove the tag, it will just be that macOS will no longer use it for that document. If you really want to remove the tag from your computer, open the pop-up menu Finder → « Settings» → « Tags" Select the tags you want to remove and click " Delete».

Create favorite tags

If desired, the user can add favorite tags to the context menu for quick access to files in the section Finder → « Settings» → « Tags" Just drag tags onto the panel Favorites.

To remove a tag from Favorites, click on it and “throw” it out of the panel.
Adding tags using the toolbar
You can add tags to documents in various ways, including using the “ Edit tags» on the toolbar. The method works on the same principle as described above. If the button Edit tags" is not displayed on the panel, right-click anywhere on the panel.

In the menu that appears, select the option “ Change toolbar" to view all available buttons and drag the button " Edit tags» to the toolbar.


Adding tags using the File Inspector (Properties)
You can add\remove tags in File inspector. To call Inspectors open " File» → « Properties» or press the combination ⌘Cmd + I. Adding/removing tags is carried out in the same way as above.

You can also add tags to files in applications (Viewer, Pages, and QuickTime Player) using the menu "Documentation", which appears when you click on the file name.

The ability to add tags in applications only applies to files; assigning tags to folders is done through the context menu, toolbar, or File inspector.

I wrote about SongGenie & CoverScout 3, and also mentioned the MPFreaker utility.
Each of these programs has its own capabilities, purpose, as well as pros and cons. Again, all these programs are paid.
What else is worthy of attention for editing tags of mp3 files.
TriTag
Developer website: www.feedface.com/software/tritag.htmlPrice: free.
This utility can perform a very valuable operation - getting tags from file names. Other features are programs: renaming files according to tags, creating a directory structure (a la iTunes, i.e. artist/album/track.mp3). It was also possible to work with FreeDB, but unfortunately this option is not available now due to the fact that MAGIX has removed the web interface for accessing the database.
Personally, I use it very often, because I always review and edit tags before adding files to the iTunes library, otherwise it doesn’t give me joy to sort through a bunch of Track 1 files in iTunes.
Actually, the only thing this program can’t do is add covers, but CoverScout does an excellent job of this. Although personally, I usually look for pictures myself in Google Images and insert them into iTunes.
Screenshots of the program:


Musorg
Developer website: peippo.euPrice: free.
This program can, one might say, do everything the same as TriTag plus something else: work with tags of both one file and several at once, rename files and directories according to tags, make queries to FreeDB and musicbrainz. If the program itself could not find the data on FreeDB, you can specify the artist and album yourself, and then the program will find matches on FreeDB. However, there is one feature that must be remembered - this is that the files must be located in the correct sequence; the program does not know how to understand which file should be first and which should be second. Another minus is that sometimes there are problems with Russian names.
Overall, the program is convenient. If only it had the functionality from TriTag, it would be absolutely wonderful.
Screenshots of the program: 


ID3 Editor
Developer website: www.pa-software.comPrice: €12.00 (Euro)
What good can be said about this program. The only thing she can do is edit the tags of one single open file. That's all. Oh yes, don't forget the price of 12 Euros!
Screenshots of the program: 
Media Rage
Developer website: www.chaoticsoftware.comPrice: $29.95
This is a whole set of tools for working with ID3 tags. Using this program, you can edit tags, analyze and equalize the sound level in mp3 files, play files without leaving the program, rename files, find covers, search on FreeDB, move your media library, convert to different formats, and much more. The program can work with MP3, AAC/MP4, FLAC, AIFF, WAVE, BWF, Ogg Vorbis. It is also impossible not to mention such a possibility as pipeline execution of a set of utilities. In general, everything you need and even more in one bottle.
Screenshots of the program: 


MusicBrainz Picard
Developer's website: musicbrainz.orgPrice: free.
MusicBrainz Picard is a cross-platform program (written in Python) for working with MP3 tags using MusicBrainz. It supports all major audio file formats, can calculate and search by disk ID (for CDs), and has good Unicode support. By the way, the site has a detailed How-To for using the program.
Screenshots of the program: 
The Tagger
Developer website: getthetagger.comPrice: $29.
Based on a tip, FreZZey has been added to the list. The Tagger can edit tags for several files at once, make queries to Discogs, rename files according to tags, get tags from file names, and edit covers.
Screenshots of the program: 

Kid3
Developer's website:Price: free.
Based on a tip, DeepSweet has been added to the list. Kid3 is a cross-platform tagger. It can edit tags for several files at once, make requests to Discogs, gnudb, MusicBrainz, TrackType.org, copy data from id3v1 to id3v2 and vice versa, rename files according to tags, get tags from file names, work with covers, it really does this in a unique way - it opens Google images for you and asks you to drag the found cover into the program.
Screenshots of the program: 
Conclusion.
That's all the applications I wanted to talk about. The only thing that can be mentioned is the Song Sergeant program. But it is still designed specifically for working with the iTunes library. It can find duplicate songs in your library, can find missing (not found) files, show files with incorrect names, and also put it all in order. But since it has nothing to do with editing tags, I did not include it in the review.At the end of the review, I decided to make a summary table of the main features of the programs.
| Program | Price | Editing tags for a single file | Editing tags of several files | Getting tags from file names | Renaming files according to tags | Auto-fill tags | Search and add covers |
|---|---|---|---|---|---|---|---|
| TriTag | For free | + | + | + | + | - | - |
| Musorg | For free | + | + | - | + | via a request to FreeDB or MusicBrainz | - |
| ID3 Editor | €12.00 | + | - | - | - | - | - |
| Media Rage | $29.95 | + | + | + | + | via a request to FreeDB | + |
| MusicBrainz Picard | For free | + | + | - | - | via request to MusicBrainz | - |
| The Tagger | $29 | + | + | + | + | via request to discogs | + |
| Kid3 | For free | + | + | + | + | via request to discogs, gnudb, MusicBrainz, TrackType.org | + |
P.S. Unfortunately, there are no programs yet that can replace Tag&Rename under Windows, but in my opinion, TriTag, Musorg, CoverScout, and maybe just Media Rage, even despite their somewhat confusing and complex interface, can adequately perform basic actions for working with tags in Mac OS X.
UPD 1: Watched Kid3 and The Tagger. Very worthy programs.
UPD 2: mentioned Song Sergeant.
UPD 3: moved to the blog Sound and Music.
One of the new features that OS X Mavericks brings to us is tags. This is a completely new and very convenient way to organize your files. If you've used Flickr, Tumblr, or WordPress before, you probably know what tags are and how they work. As a sorting and filtering tool, tags are almost perfect. With one click, you can sift through files and find exactly what you need. If you still don’t use them when working on your Mac, in this article I will try to convince you and tell you about their usefulness.
Think about how best to organize your files
Each of us has our own approach and what may be very convenient for some users is categorically unacceptable for others. So before you start using tags, take a moment and decide how you want to organize your files on your Mac. Maybe by date or say by type? Or by projects? Or perhaps in some other way. Think, take your time. Organize your files into main folders in Documents and create a list of key tags that will suit your working style.
One color for related tags
Mavericks allows you to choose a color for each of your tags, but there are only seven colors available at the moment. Keep this in mind to get the most out of the limited number of colors. For example, you could choose red for the tags “pets” and “cats,” while blue for “work” and “projects.” This method is not ideal, but it will at least allow you to “save colors” when organizing your workspace.
 To assign a tag, right-click on the file, select “Tags” and enter the name of our tag in the pop-up menu. If you need to add several tags, just press enter and enter each subsequent tag.
For example, I assigned the tags “sega rom” and “snes rom” to the Sega and Super Nintendo roms, respectively, and to each of them an additional purple color tag. Now I can display roms separately for each console, or use a color tag to display all my roms. And all this in the current Finder tab, without having to wander through folders and look for these files. Convenient, right?
We assign tags when saving or creating documents.
 Be sure to get into the habit of adding tags when creating files. Believe me, this will make your life much easier in the future. If you're working with old files created in previous versions of OS X, you can assign tags when you open the files. This is done very easily: just click on the document name in the window title and enter the necessary tags. Tags are added similarly when creating a file, the main thing is not to forget to do this.
Create a hotkey for assigning tags
If you use keyboard shortcuts at work (and I'm sure you do), then you'll be tempted to create a shortcut for assigning tags. It's not there by default, but adding it won't be difficult.
 Let's go to system Settings, to section Keyboard and open the tab Keyboard shortcuts. In the sidebar on the left, click App Shortcuts, Then +
and in the drop-down menu indicate: Program – Finder, Menu name – Tags… All that remains is to select the keyboard shortcut, I use ⌥⌘R, but you can assign any other one at your discretion. Now, whenever you need to assign a tag to a file, just click ⌥⌘R and start entering tags.
Let's go to system Settings, to section Keyboard and open the tab Keyboard shortcuts. In the sidebar on the left, click App Shortcuts, Then +
and in the drop-down menu indicate: Program – Finder, Menu name – Tags… All that remains is to select the keyboard shortcut, I use ⌥⌘R, but you can assign any other one at your discretion. Now, whenever you need to assign a tag to a file, just click ⌥⌘R and start entering tags.
Using smart folders
Another handy way to use tags is to use them in smart folders. You can create a smart folder that will collect all files with specified tags in one place. For example, I will create a folder and set the tags “sega rom” and “snes rom” as filters. As a result, we get a convenient and most importantly fast access to all files marked with the specified tags. In the same way, you can structure your working documents for projects or any other files.
 Creating a smart folder couldn't be easier. In Finder, click ⌘F(or use the menu File - Find...) and holding down the key ⌥
press the button +
in the search bar (it will change to an ellipsis). After that, we add filtering conditions. Choose - Tag(click Other... and find this item in the general list), indicate the necessary tags. All that remains is to give our folder a name and save it.
Creating a smart folder couldn't be easier. In Finder, click ⌘F(or use the menu File - Find...) and holding down the key ⌥
press the button +
in the search bar (it will change to an ellipsis). After that, we add filtering conditions. Choose - Tag(click Other... and find this item in the general list), indicate the necessary tags. All that remains is to give our folder a name and save it.
* * *
Here are some tips for using tags in OS X, hopefully they will help you better organize your working space. If I missed something or if you know other cool tips for using tags, please add me in the comments.
Fresh is something like an information board that displays all the files and folders you have recently worked with.
Fresh, a little-known program for Mac, has become one of the best recent finds for me. It's easy to use and fits perfectly into my new way of organizing files and folders.
Essentially, it's like a bulletin board that displays everything you've recently worked with. Moreover, access to it is possible even from full-screen applications.

Fresh consists of two panels that can be called up through: a keyboard shortcut (for me it’s a super button from CapsLock Vieste with F) or by moving the cursor and clicking the mouse at the very edge of the screen.
- The Fresh Files top panel displays previews of all files that have recently been created or changed: documents, screenshots, downloads, etc.
- Bottom panel of The Cooler - favorite data. There you can drag and drop everything you might need in the near future: files, folders and even disks.
All panels have a minimalistic design. The colors can be customized as you wish. Ultimately, my Fresh began to look like this:
 Colors of Fresh panels can be customized at your discretion
 Initially, the Fresh Files panel displays everything, so it requires a little configuration. If you see some kind of “technical” file there, like a TextExpander or 1Password backup, then just right-click on it and select Never Show Items In... or Never Show Files With This Extension.
 Fresh can ignore selected folders and file types
 Fresh can also tag information, which is very important for my file organization system. Tagging helps to combine files that are physically located in different folders or even media. This is very convenient, since one file can be an element of several projects at once.
Now I will not dwell in detail on the technique of working with tags (this will be the subject of another article), but will only tell you what Fresh can do in this regard.
For tagging, the open component OpenMeta is used here, which “glues” tags and ratings to files through additional xattr attributes. In fact, now this is the only affordable way tag information in macOS. An alternative to OpenMeta is the standard ability to add comments for Spotlight through the properties of any folder or file.
 Comments Spotlight - a simple alternative to OpenMeta
 The advantage of OpenMeta is that a tag can be assigned to absolutely everything: a bookmark, an email, a file, a folder, etc. Whereas Spotlight comments are only available for files and folders. Minus - tags are not visible through the usual function of viewing file properties in macOS, so to visually work with their lists you need to use special applications: , Leap, Punakea ( full list see the OpenMeta website).
Fresh doesn't allow you to view all existing tags in the system, but it can create them and also search for information on them through its Spotlight-based search (the search window is located just above the Fresh Files panel).
In order to tag files, just select them and drag them to a special pop-up panel that appears on the edge of the screen. This can be done from anywhere in the system; you do not need to launch Fresh itself for this.
 You can tag files simply by drag-n-drop
 Example of using tags
Tags can be very useful for both locating and organizing files on disk. They can work as triggers for rules in Hazel.
For example, I recently started working on a new website design, so I actively save everything that might be useful: screenshots of sites and applications, resource files, etc.
On my computer, all screenshots from Mac/iPhone/iPad go into the Screens folder (iOS screenshots are automatically pulled from the photo stream). Resource files downloaded from the network - into a folder Downloads.
It is clear that all these materials need to be further sorted, but you don’t want to do this manually in Finder. This is where Fresh comes in with its tagging capabilities and Hazel as a sorter.
After taking a screenshot or downloading a file, I launch Fresh with the combination CapsLock keys F and set the corresponding files in the Fresh Files window @design.
As soon as Hazel notices a file with this tag, it immediately applies one of the rules I set to it. No wandering around the Finder, the order is always maintained automatically, and files are not lost.
Example of using the Fresh Files panel
For most reviews I have to upload the app icon through the WP admin. These are the ones you see on home page site. In my Alfred review, I already explained how I extract them from programs with a simple command directly to Desktop.
With the advent of Fresh, my workflow has improved a little. Now the icon ends up not on the Desktop, but in the aforementioned Screens folder (which is more logical). Firstly, it does not clutter the Desktop, and secondly, it eliminates the need to delete the icon manually (Hazel automatically deletes all files whose age exceeds 7 days).
Previously, I had to grab an icon and drag it onto the Safari window, which is quite inconvenient, especially with a large number of full-screen applications. Fresh has simplified the procedure significantly. The new algorithm looks like this:
Without leaving the Safari window, I execute the Alfred command to extract the icon
I launch Fresh, where it already appears in the list of new files
I drag it into the WP loader.
In conclusion
Despite having some minor issues, Fresh has proven to be an excellent solution for performing small tasks with new files. In just a few days, this utility became one of the most used on my Mac. At $8.99, this is a great buy.