How to install gimp on your computer. How to Install GIMP
Today in this post we will walk you through the process. installing GIMP on the Windows operating system, and we will also talk about what this program is and where you can download it.
GIMP - what is this program?
GIMP (abbreviation GNU Image Manipulation Program) is a free program for creating and editing images. GIMP is a very powerful tool, which is why many people compare it to Photoshop ( GIMP is a free alternative to Photoshop.).
The first releases of the program appeared back in 1995. At first, GIMP was developed for UNIX-like operating systems, but then versions appeared for the Windows operating system. Today, the GIMP graphics editor is very popular among both Windows and Linux users; even many Linux distributions include GIMP by default ( those. you don't even need to install it).
GIMP was originally developed by Spencer Kimball and Peter Mattis. At the moment, quite a lot of developers have already contributed to the development of the project ( If anyone is interested, you can check out the full list of developers on the authors page of the official website).
GIMP is available for both 32-bit and 64-bit systems. GIMP supports many languages, including Russian, which is very good.
The main features of GIMP include:
- Drawing, including a set of tools such as: brush, pencil, spray and others;
- Transform: rotate, scale, warp and reflect;
- Layers, channels, filters;
- Selection tools such as rectangular, elliptical, free marquee, " magic wand"and other selections;
- Tools for color correction;
- Supports formats: GIF, JPEG, PNG, XPM, TIFF, TGA, MPEG, PS, PDF, PCX, BMP and others;
- And also many other useful features and functions.
Official website of the project – www.gimp.org
Where can I download GIMP?
You only need to download software online from official sites, so we will download GIMP from the official site. To do this, go to the download page, here it is - https://www.gimp.org/downloads/
Then we select the download method using a browser or via torrent, in this case I choose the method using a browser, so I click on the following link.

Description of installing GIMP on Windows
We will consider the process of installing the GIMP program using the Windows 8.1 operating system as an example; it can be installed on Windows 7 or 10 in exactly the same way.
Step 1
Run the downloaded installer file. In the first window, we are immediately prompted to select a language, and by default it will already be selected correctly. Click " OK».

Step 2
Next, for automatic installation, you can immediately press the button “ Install", in which case the installer will perform the entire GIMP installation automatically, and you won't even need to do anything else. But if you want to configure some installation parameters, for example, change the default installation directory or change the set of installed components, then click the " Tune" We, for a more detailed understanding, let's select manual installation and click the " Tune».

Step 3
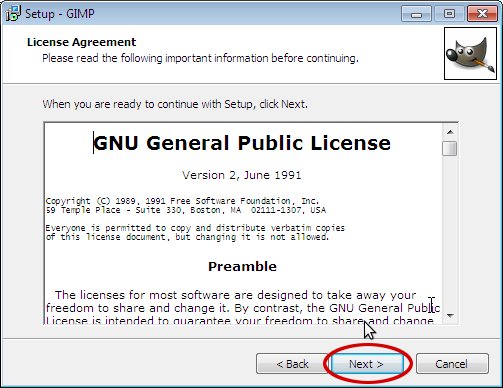
First, agree to the terms of the license agreement, click “ Further».

Step 4

Step 5
Then if you don't need the full set of components, you can select " Compact" or " Selective"installation, I will leave it as default, click " Further».

Step 6
In the next step, you can select the file types that will be associated with the GIMP program, click " Further».

Step 7
If you want the installer to create a shortcut to launch GIMP on the desktop or in the Quick Launch panel, then check the appropriate boxes and click " Further».

Step 8
Everything is ready for installation, check the parameters and click “ Install».

The installation has started.

Step 9
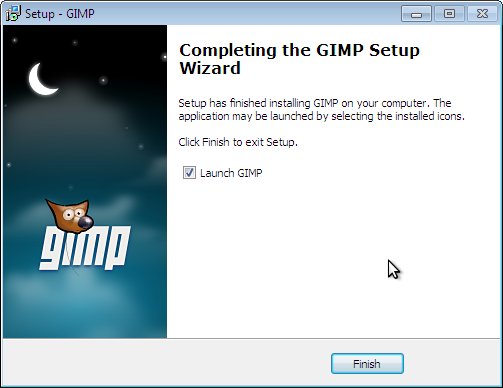
The installation is complete, click the " Complete».

We launch the program using a shortcut on the desktop or from the Start menu ( The first launch of the program may take some time).

That's all for me, good luck!
Greetings to all blog readers website. In the next lesson you will learn how to download and install the free graphics editor GIMP.
Today's article should have been one of the first on the blog, since it was with downloads and installation begins the user's first acquaintance with the program. But after about 90 lessons and articles about gimp graphic editor, I still decided to write for everyone beginners users step-by-step instructions, which detail the download steps and installing a free graphics editor.
After clicking the “next” button, the “Ready to install” window will open. Here you need to click the “Install now” button
This will start the installation process for the Gimp program. By default, the program directory where is installed gimp is here:
%SystemDrive%Program FilesGIMP-2.0,
where %SystemDrive% is the drive letter where your operating system is installed.
Once the installation of the program is complete, the last window will open with a message about the successful installation of the editor.
By default, the “Launch GIMP” item is activated, i.e. Immediately after clicking the “Finish” button, the program itself will start.
If you uncheck the “Launch GIMP” item, you can launch the graphic editor by clicking the following shortcut on the desktop.
In addition to the program itself, you can download more user manual GIMP, which will help you initially learn in detail all the intricacies of working with a graphics editor. Since the manual is very large in size (about 25MB), it is not included in the standard GIMP installation, but you can easily download it for free, at the following link:
This is the lesson about “how to download and install the GIMP editor” completed. Thank you for your attention. Next, I recommend that you study the lesson, where you will become more familiar with the program.
Best regards, Anton Lapshin!


The free raster graphics editor Gimp (The GNU Image Manipulation Program) is an affordable alternative to commercial Photoshop. With it you can create logos and edit photos, retouch, colorize and convert to many formats. Gimp can open and edit, with some restrictions, Photoshop .psd files. If you do not have the opportunity to purchase Photoshop or another commercial graphic editor, then gimp in this case will be a good, completely free and quite functional replacement. Below we will show you how to install gimp on a computer with the Windows operating system.
Login to the site and start downloading |
||
|
To start downloading the installation program, go to the website at www.gimp.org/downloads and click on the Download gimp link to download. |
||
|
The browser will ask you to confirm whether you need to download this file. We confirm by clicking on the Continue button. |
 |
|
|
The installation file download process takes some time, you need to wait. |
 |
|
|
After the installation file is downloaded, you can run it. To do this, click on the icon with the downloaded file. |
 |
|
|
Windows asks you to confirm the launch of the program. Confirm by clicking on the Run button. |
 |
|
|
User Control Center also asks you to confirm to allow the gimp installer to make changes to your computer. Confirm by clicking on the Yes button. |
 |
|
|
The gimp installation manager will launch. As always, it is recommended to close all running applications and click on the Next button. |
 |
|
|
Naturally, we agree to the terms of the license agreement and click on the Next button. |
 |
|
|
For quick installation you need to press the button Install now. Those who want to make more precise settings can click on the Configure button. |
 |
|
|
The installation process is quick and does not take much time. |
 |
Finally: GIMP 2.10 is available for download for Windows, MacOS and Linux.
The latest stable version of this wildly popular open source image editing tool has been released. Very often it is considered as an alternative to Photoshop.
The tool was developed over the course of 6 years, which is quite good, considering that open source software is just beginning to gain its well-deserved popularity.
The release of GIMP 2.10 brings with it a huge number of different changes and improvements. Designers will definitely appreciate the range of new features available in version 2.10.
The previous version of this graphic editor was released back in 2012. Gimp 2.10 has been in development for 6 years, we hope that our wait was not in vain...
Features of GIMP 2.10
The changes in GIMP 2.10 are immediately visible. For example, an updated interface. The new theme is activated by default, and the tool icons have also been updated.
The GIMP developers say these changes are designed to help improve concentration. The user interface essentially dims so that the focus is on the direct content of the content.
This technique is used not only in the new version of Gimp. Other open source software developers have exactly the same opinion.
Features of the new version of Gimp 2.10:
- By default, a new dark theme and updated icons are installed
- Choice of 4 user interfaces
- Option to enable color toolbar icons
- Ability to customize icon size
- Multithreading support
- New color mixing modes
- Layer groups support masks
- New Unified Transform tool
- Warp Transform Tool
- New Brush Conversion Tool
- Editing a Gradient on Canvas
- The Foreground Select tool supports sub-pixel selection
- 80 GEGL-based filters (formerly "effects")
- Split view to compare native and GEGL filtering
- Improved disaster recovery
- Ability to view/edit photo metadata
Also in the new version, photographers can use new GEGL-based filters, including Shadows/Highlights and high-pass.
Additionally, you can now use Darktable or RawTherapee as plugins to open files that were not created in GIMP.
GIMP 2.10 also improves support for file formats, including TIFF, PNG, PSD, FITS and JPEG2000.
And of course, a new welcome window greets you every time you launch the application:

Experimental tools
A number of experimental tools are available but not enabled by default. You can enable them (but be aware that problems may arise) by running GIMP 2.10 with the following flag:
Gimp-show-playground
Then go to Edit > Preferences > Playground to enable these very experimental tools.
How to Install GIMP 2.10 on Ubuntu and Linux Mint
The GIMP 2.10 package for Windows, MacOS and Linux (as compiled sources) is available on the official GIMP website.
Flatpack
To install Gimp 2.10 as a Flatpak application - simply follow this link.
You can also use this command:
Flatpak install https://flathub.org/repo/appstream/org.gimp.GIMP.flatpakref
PPA
Remove GIMP 2.8 (if installed) before adding this PPA.
Sudo add-apt-repository ppa:otto-kesselgulasch/gimp sudo apt update && sudo apt install gimp
AppImage
You can try installing Gimp 2.10 using AppImage. Follow this page for news.